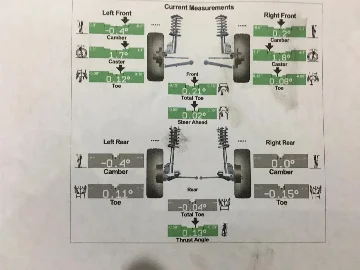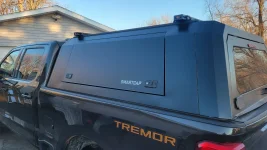
its nice having things dialed in 

Follow along with the video below to see how to install our site as a web app on your home screen.
Note: This feature may not be available in some browsers.

Did you mean X1E or H2D? The X1E and H2D Pro models are enterprise level units that cost about 1-2k more than the regular model, they get a physical switch to turn off the WiFi board and an Ethernet port. Neither are worth the money for the average consumer.You're awesome, man. Thanks for the offer. I think i have it dialed in enough for what i'm making. I've done exactly what you've stated though, cut every speed in half and take the acceleration down by 80-90%.
I've only ever owned a Bambu X1C after a coworker who was into 3d printing recommended it to me. Its been great. I've actually been eyeing the X1D but i dont have a need for a second printer. If i do, i DEF know who i'm calling
One thing i find interesting: i've taken the most recent patches and i've been getting an issue where it'll set the nozzle temp to 140 after bed level calibration and wont change even though itll execute the flow cal and start the print. Wasted enough time i've started checking the gcode each time if i'm not running a saved project.
Happens when i edit the filament profile.
Not sure what is going on but even if i start with a stock filament profile and only edit nozzle and bed temps... itll default the temp in the code. Annoying.
H2D is what I meant. Its the one that has two print heads and can laser engrave.Did you mean X1E or H2D? The X1E and H2D Pro models are enterprise level units that cost about 1-2k more than the regular model, they get a physical switch to turn off the WiFi board and an Ethernet port. Neither are worth the money for the average consumer.
The H2C is the model that I’d highly consider if I needed multi color or multi material in one print.
The H2D and H2S are the two biggest build volume and the H2D allows you to print (for example) PETG on one nozzle with PLA on the other nozzle to print supports that are 0.0mm spacing and peel off auper easy withut affecting the integrity of the print due to a lack of proper flushing of materials that don’t adhere to each other.
As for the changing filament profiles, I’ll ah r to try that. What version firmware are you running on the machine?

There is a new Bambu slicer, 2.4.7 the older one had issues, try updating.then check your printer and see if it has a firmware update as well. Could also be causing an issue.H2D is what I meant. Its the one that has two print heads and can laser engrave.
Bambu Slicer: 2.3.1.51


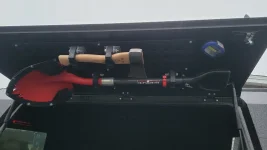
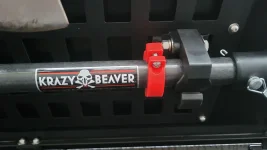
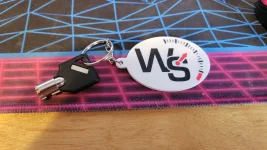
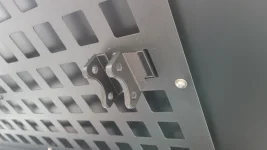
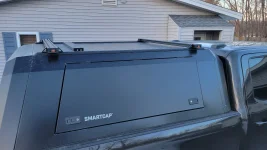
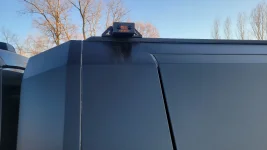
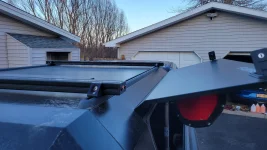
Very cool. Did you make the metal mounts that mount to the molle panel for the clamps? Haven't searched for print plans for the clamps, but will need some in the near future for my bed cap. Like the cyberbrick soccerbots. My 7yr old grandson would have fun with that. Looking forward to making gadgets for the truck.My shovel mount for the Smartcap has been holding up great, but there is a minor annoyance where the shovel slides forward and makes opening the side panel more difficult (you have to awkwardly reach in and pull back the shovel). So I designed a simple stop collar to clamp on the shovel handle. It is made from PETG and could use some tweaking, but should work as is. I also made a little keychain for my hitch receiver lock so I can find it in the center console. The Bambu slicer has a nice feature built in that can make keychains from pictures.
I am working on designing a bed drawer/sleep platform system, and I'm not sure yet if I'm going to go with plywood or aluminum extrusion construction, but I am thinking that 3d printed components will be integrated somehow. More to come on that.
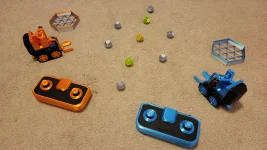
Not truck related, but I printed and assembled the cyberbrick soccerbots and controllers and they are cool! A little pricey, but like a more advanced Lego set that also has electrical components, programming, and you need to print most of the parts yourself.
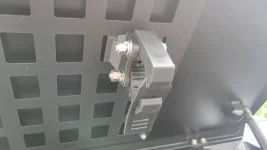
The quick fist mounts to the molle panel with 3d printed clamps that I designed. The mounts for the shovel are printed in PA612-CF, the hatchet mounts were the prototypes that I printed in gray PETG. The clamps are secured with the bolts that hold the quick fists. They are actually quite robust and hold securely without rattling.Very cool. Did you make the metal mounts that mount to the molle panel for the clamps? Haven't searched for print plans for the clamps, but will need some in the near future for my bed cap. Like the cyberbrick soccerbots. My 7yr old grandson would have fun with that. Looking forward to making gadgets for the truck.
Great song.View attachment 141297View attachment 141298
I 3D printed a microphone mount for my Midland GMRS radio.
I got them commercially produced and sell them now that I finished the design.

2022 Super Duty Handheld Mic Dash Mount for Midland GMRS Radio
--------------------------THIS VERSION IS THE DRIVER SIDE - 2022 Super Duties only If you are looking for the PASSENGER side version, you can find that here.-------------------------- Are you tired of dropping your mic into your cup holder or searching for it in the storage compartment? This...legmar.shop


I bet @Optimus🤖 has had some similar Krazy Beaver out there in the desert......My shovel mount for the Smartcap has been holding up great, but there is a minor annoyance where the shovel slides forward and makes opening the side panel more difficult (you have to awkwardly reach in and pull back the shovel). So I designed a simple stop collar to clamp on the shovel handle. It is made from PETG and could use some tweaking, but should work as is. I also made a little keychain for my hitch receiver lock so I can find it in the center console. The Bambu slicer has a nice feature built in that can make keychains from pictures.
I am working on designing a bed drawer/sleep platform system, and I'm not sure yet if I'm going to go with plywood or aluminum extrusion construction, but I am thinking that 3d printed components will be integrated somehow. More to come on that.
Not truck related, but I printed and assembled the cyberbrick soccerbots and controllers and they are cool! A little pricey, but like a more advanced Lego set that also has electrical components, programming, and you need to print most of the parts yourself.


I bet @Optimus🤖 has had some similar Krazy Beaver out there in the desert......
Man, you ain't lying! Once these Krazy Beaver soccer moms get all wired up, they turn into Soccerbots!soccerbots


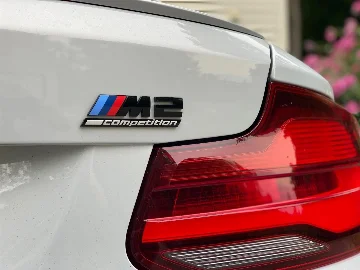
A lot of people use their phones if it's something simple.Anyone recommend a budget 3D scanner? Also does anyone recommend anyone for 3D rendering? Looking to scan and emblem and have it 3D rendered so I can print whatever I want and change the emblem.
TIA
I have used a Peel3D scanner and am not that impressed with it. It might have been limited by the laptop I was using with it though. I am pretty interested in the Creality scanners but I have no experience with them. Depending on what you are looking to accomplish, it might be easier to just draw it natively in your 3d CAD software rather than scan it, especially if you are trying to make changes to it. For something like an emblem, a straight-on picture that you can trace in your software would be a good place to start.Anyone recommend a budget 3D scanner? Also does anyone recommend anyone for 3D rendering? Looking to scan and emblem and have it 3D rendered so I can print whatever I want and change the emblem.
TIA

Lemme get a mini version!