🛠️ What did you do to your Tremor today? [2026 edition]

How

How hard is it to get wires up to those switches. I made a mistake at purchasing and did not order Upfitters. Would this be an option for New installation?
The install was medium intense. I highly recommend the full kit from SDHQ. It comes with the 3d printed piece that allows you to utilize the sunglass holder location for your controller and the mount needed for the main body that goes in the engine bay. I ended up extending the harness that goes from the controller to the module in the engine bay, it was about 12” too short for the way I wanted to route it. This wasn’t too bad, because I had to cut it, it meant I only needed to run the bare wires through the firewall, instead of the plug end. I am kind of OCD about how I install stuff, so I take my time. Total install time was about 14-16 hours, so it is definitely a project. However, once it’s done, I think it is the best solution on the market, and it has amazing flexibility.
 
The install was medium intense. I highly recommend the full kit from SDHQ. It comes with the 3d printed piece that allows you to utilize the sunglass holder location for your controller and the mount needed for the main body that goes in the engine bay. I ended up extending the harness that goes from the controller to the module in the engine bay, it was about 12” too short for the way I wanted to route it. This wasn’t too bad, because I had to cut it, it meant I only needed to run the bare wires through the firewall, instead of the plug end. I am kind of OCD about how I install stuff, so I take my time. Total install time was about 14-16 hours, so it is definitely a project. However, once it’s done, I think it is the best solution on the market, and it has amazing flexibility.

Thanks for being honest on 14-16 hours install time. That’s exactly what i anticipated doing it the OCD way, which is how i approach these projects too.
 
Thanks for being honest on 14-16 hours install time. That’s exactly what i anticipated doing it the OCD way, which is how i approach these projects too.
I live close to SDHQ, and I went in there after I installed it and mentioned how long it took. They stated that they allot close to the same amount of time for this install by their techs. That made me feel a little better.

The hardest part of the entire install was removing a stupid plastic piece in the engine bay that clears the space for the mount. This piece will never go back in, so do yourself a favor and don’t try to remove it gently. Get aggressive and break that little bastard. I spent over an hour trying to reach the clips that hold it in place. Finally a pry bar broke its will to hold on….and it.
 
Last edited:
Last edited:
The install was medium intense. I highly recommend the full kit from SDHQ. It comes with the 3d printed piece that allows you to utilize the sunglass holder location for your controller and the mount needed for the main body that goes in the engine bay. I ended up extending the harness that goes from the controller to the module in the engine bay, it was about 12” too short for the way I wanted to route it. This wasn’t too bad, because I had to cut it, it meant I only needed to run the bare wires through the firewall, instead of the plug end. I am kind of OCD about how I install stuff, so I take my time. Total install time was about 14-16 hours, so it is definitely a project. However, once it’s done, I think it is the best solution on the market, and it has amazing flexibility.
Thanks so much for this reply. I am going to look it up right now. Did you break any clips on trim pieces?
 
Thanks so much for this reply. I am going to look it up right now. Did you break any clips on trim pieces?
Not on the interior. The only clips that needed to come out were when I took the overhead console down to remove the sunglass holder and install the controller. I think I went to YouTube university to learn the location of the clips, and it came off without much fuss.

As stated in my previous post, there is a plastic shroud in the engine bay that needs to be removed to install the mount for the main unit. I broke the hell out of that thing, but it will never go back in anyway.
 
Finally pulled the trigger
IMG_4542.webp
 
Straightened my steering wheel via the tie rod adjusting sleeve. It was about 3-4 degrees off center since the day I drove it off the lot. My OCD is much happier now.
I need photos of this location!
 
If anyone is running any wires from their cab to the engine bay, I cannot recommend this tool enough. It is amazing at punching through the big rubber grommet in the drivers footwell and its hollow so you can feed a wire or pull cord right through it while it is inserted in the grommet.


https://www.oreillyauto.com/detail/...rformance-tool-wire-insertion-tool/pfm0/w2935

Along with a wooden dowel to help prevent any possible wire snags, I used a metal drinking straw on the driver's side firewall grommet.

SwitchPros will ship their product with the connector removed to help fish through the vehicle. As the wires will be pinned you just run the cable, then once everything is in place you insert the ends into the connector. I've been using mine for quite awhile now, no issues.

IMG_2177.webp


2022 overhead console SP9100 panel :

IMG_2097.webp


IMG_2098.webp


I found a awesome place in the engine bay for the SP9100 Main control board :

IMG_2014.webp


:cool: :cool: :coffee: :coffee: 🇺🇲 🇺🇲 🇺🇲 🇺🇲
 
Tint day :cool:

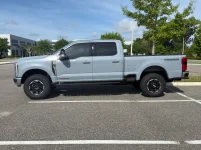
Front = 28% (to stay legal) | Rear = 20%

Tinting - Side View.webp

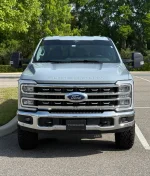
Eyebrow Strip

Tinting - Front View.webp

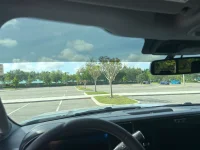
The eyebrow strip made a huge difference in the Florida sunshine. Driver POV:

Tinting - Driver POV.webp

And a plug for Mike at Sunshade Mobile who did the work onsite at my office. Highly recommend his services if you're in the Central FL area:

Tinting - Business Card.webp
 
Was brave enough to connect the truck to the laptop... Enabled Bambi mode and lower the TPMS. Had the black box on the back-up screen on my list but I wasn't quite brave enough to jump into the "As-Built" and module reset side of things.

It was easier than I had expected. OBDLinkEX worked nicely, as expected. TPMS light is off now (panicked for a minute as all four tires stopped reading, but recalled that driving a few blocks should do the trick, which it did.)
Bambi Mode.webp
 
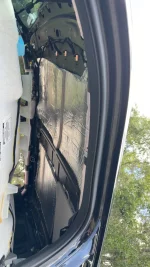
Dropped the headliner to add some sound proofing and insulation

Some cheap foil backed butyl rubber to the ceiling with a layer of melamine foam. Then added a sheet of felt to the headliner and put 2 layers of 200mil foil backed CCF on the felt

IMG_7698.webp
 

Attachments

  • IMG_7697.webp
    IMG_7697.webp
    135.4 KB · Views: 18
Was brave enough to connect the truck to the laptop... Enabled Bambi mode and lower the TPMS. Had the black box on the back-up screen on my list but I wasn't quite brave enough to jump into the "As-Built" and module reset side of things.

It was easier than I had expected. OBDLinkEX worked nicely, as expected. TPMS light is off now (panicked for a minute as all four tires stopped reading, but recalled that driving a few blocks should do the trick, which it did.) View attachment 253058
As-built is not bad. Just take your time, write original code down and write down exactly what you changed.
 
Of interest, on my 2016 Ram I was able to set the pressure limits on the AEV ProCal but I had to have the dealer run a key reset so this was much easier (and cheaper.)
 
Got the A pillar lights mounted and wired up today, thanks to Nick at Apollo off road for help with the XL80’s and Secret Santa for the brackets.
IMG_1381.webp
IMG_1382.webp
IMG_1383.webp
IMG_1385.webp
 
Back
Top Bottom