Did this work?Continued the tire noise experiment
ETA: to head off any comments, yes, a fender liner will be covering that up and the dangling air line will be secured.
View attachment 248334
Follow along with the video below to see how to install our site as a web app on your home screen.
Note: This feature may not be available in some browsers.
Did this work?Continued the tire noise experiment
ETA: to head off any comments, yes, a fender liner will be covering that up and the dangling air line will be secured.
View attachment 248334

I'm not even sure i need those little clips. Remember reading on here someone saying they 'helped'.Good choice to cover it back up. Should be ok without, but as a former engine builder I don’t leave anything open for the chances. Not worth it! I built a “clean room” (plastic sheet and PVC pipe frame) with HEPA filters to assemble engines because of the doggo. I find dog hair inside the freezer and I’ve never seen him in the freezer. Zero chances taken.


Damnit it’s still there!Hunt for rattle in dash part 3. Bought some felt backed tape this time, and took apart a lot more. Had to remove the pillars, banks idash, etc… so I could remove the top of the dash. Took out the instrument cluster, honestly, kind of sounded like noise I was chasing when I shook it.
Taped the crap out of the dash… test drive in a few minutes after everything put back together.
I wanted to pull apart the center console and do the same thing but ran out of time
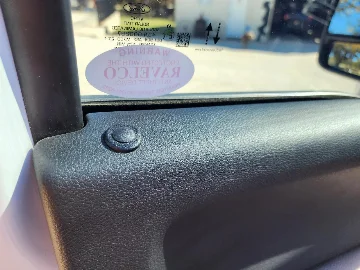
View attachment 249169
View attachment 249170

 New River Canyon Trail 2026
 Moab Trail Run 2026
 Kentucky Ford Plant Tour 2026
 Flagstaff Trail Run 2026
+3


If that doesn't look OEM, I don't know what does. Pretty sweet!Installed the Switch Pros RCR 12 today, with the SDHQ mount kit. Pretty intense install, but the end product is worth it.
View attachment 249175
 Moab Trail Run 2026
Kentucky Ford Plant Tour 2026
Flagstaff Trail Run 2026
 Big Bend Trail Run 2025
+5

I wonder if it would help to have people in the other seats to help narrow down there the noise is coming from to rule out sound reflecting off the windshield and making it sound like it's coming from the dash.Damnit it’s still there!
Moab Trail Run 2026
Kentucky Ford Plant Tour 2026
Flagstaff Trail Run 2026
Big Bend Trail Run 2025
+5
I see you saved a spot for the ejection seat button.Installed the Switch Pros RCR 12 today, with the SDHQ mount kit. Pretty intense install, but the end product is worth it.
View attachment 249175

That’s a great idea. I’ve got a squeak under my truck. Drives me crazy. My 10 year old truck was quiet. I’ll have to get the wife or daughter to drive up the driveway while I listen.I wonder if it would help to have people in the other seats to help narrow down there the noise is coming from to rule out sound reflecting off the windshield and making it sound like it's coming from the dash.

Well, I was thinking the 8-button, but seeing this makes me wonder if I could come up with a need for 4 more buttons.Installed the Switch Pros RCR 12 today, with the SDHQ mount kit. Pretty intense install, but the end product is worth it.
View attachment 249175
 New River Canyon Trail 2026
Moab Trail Run 2026
Kentucky Ford Plant Tour 2026
Flagstaff Trail Run 2026
+3
Well, I was thinking the 8-button, but seeing this makes me wonder if I could come up with a need for 4 more buttons.

Did this work?
My plan was always to put all the lights on the SwitchPro, and save the factory ones for my other accessories - winch, vhf, horn, air, sliptank, starlink.If you are going to install one, might as well future proof it now. You never know when you’re going to want to install: horns, radios, Starlink, compressors, additional lights, etc. I was thinking 8 lights would be enough, maybe I need more.

My current ARB Twin (not brushless) just crapped out on me in the desert. Been considering the new brushless one or hard-mount the Morrflate into one of my storage boxes in the rear, but that is quite a pull of 6 AWG wiring. Seeing your installation of the brushless ARB got my interest. Looks great. Where did you get the mounting bracket if I may ask?Got my onboard air installed! Went with ARB brushless twin compressor. Its installed to a custom mount in the engine bay on the driver's side battery. This mount specifically works with the gas engines not diesel. I ran all Apex Designs airlines and fittings with their Precision tire inflator and used their Rapid Precision Valve stems on my wheels. I modified the ARB provided wire harness to integrate with the factory upfitter switches. View attachment 248837
This bracket fits in the slot below the battery and bolts onto the battery hold down bracket.View attachment 248839
To make the wire connections simple I ran the ground wire to the provided factory stud on the negative battery terminal.View attachment 248840
The factory doesn't provide a stud on the driver's side positive terminal so I sourced a 6m clinching stud and added one to the poss side. It was easy to install since the terminal is soft copper. Sourced from www.pemnet.com part number HFH-M6-15ZIView attachment 248841View attachment 248842
Then I mounted the ARB provided double fuse and ran an upgraded 6AWG wire from the battery to the double fuse. The kit comes with an 8AWG wire but I upgraded to 6AWG since I chose to connect the power going to the relay for the Baja Designs dual fog pocket Squadron lights in my bumper from this double fuse to keep things clean.View attachment 248843View attachment 248844
Here is the wire diagram I used to trim off the unnecessary wire since I was going directly to my upfitters.View attachment 248845
I ran the Apex Designs airline down the frame to both sides of the truck to the factory steps then to their panel mounts.View attachment 248846
View attachment 248847
View attachment 248848
I am very impressed with the Apex products! They are very well made and easy to work with! They contribute to a fast airup-airdown time and compliment the power of the ARB brushless compressor!
View attachment 248849View attachment 248850
Here is my double swing bumper from Expedition One with a custom toolbox from Highway Products shown with the Apex Precision tire inflator mounted to the door. The mount is provided with the inflator.
I would like to thank my friends at Expedition Off-Road Development for creating this compressor mount for me. They were great to work with. This mount will be available soon on their website. If you want to get on their pre-order list they would be happy to add you! The final product will be powder coated black! eodupfitters.com
Moab Trail Run 2026
Kentucky Ford Plant Tour 2026
Flagstaff Trail Run 2026
Big Bend Trail Run 2025
+5
I suffer from the same issue. Have about $50k more in things to do to the truck and my wallet doesn't seem to want to play nice.Sadly, my wallet has not caught up with my plans…

It comes with a mounting bracket in the box, but I'm looking at other options at the moment, as I dont feel it will hold it as secure as I'd like. I'll be running a pair of 8awg wires from the battery for the positive cables for each motor, then tying the grounds into the frame. Upfitter switches 5 and 6 will be the triggers.My current ARB Twin (not brushless) just crapped out on me in the desert. Been considering the new brushless one or hard-mount the Morrflate into one of my storage boxes in the rear, but that is quite a pull of 6 AWG wiring. Seeing your installation of the brushless ARB got my interest. Looks great. Where did you get the mounting bracket if I may ask?