Upfitter Wiring Harness Discussion

IMG_2959.webp

IMG_2960.webp

IMG_2961.webp

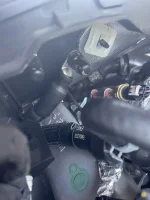
Well that couldn’t have worked out better! Strut sits nicely in between the bolts. I haven’t tested it but I can’t imagine it wouldn’t be a fantastic ground. As someone else mentioned there is a grounding lug or two right on the fire wall as well if you wanna stretch the cable that direction instead! But for me, an engineer who likes to over complicate and build things, this couldn’t have worked out better!
 
Well…. Full disclosure that was all a thought experiment and not time well spent. For whatever reason even my thin (3/16”) copper bus bar seemed to ever so slightly interfere with the hood closing square….. sigh…. Guess I’m glad I didn’t invest any money in it.

IMG_2967.jpeg

IMG_2968.jpeg

Anyway…. As @Socal mentioned above I just hooked to the ground on the firewall…. A far simpler albeit less cool solution. But it’s done and my cool copper bus bar is tossed into the junk drawer of my toolbox for a future project.
 
Well…. Full disclosure that was all a thought experiment and not time well spent. For whatever reason even my thin (3/16”) copper bus bar seemed to ever so slightly interfere with the hood closing square….. sigh…. Guess I’m glad I didn’t invest any money in it.

View attachment 161627
View attachment 161628
Anyway…. As @Socal mentioned above I just hooked to the ground on the firewall…. A far simpler albeit less cool solution. But it’s done and my cool copper bus bar is tossed into the junk drawer of my toolbox for a future project.
Wonder if a 1/16" one would work.
 
Wonder if a 1/16" one would work.
Might…. I’d probably change to a stronger metal to try 1/16”. I don’t think my copper would hold up or I’d thin it out a bit
 
Might…. I’d probably change to a stronger metal to try 1/16”. I don’t think my copper would hold up or I’d thin it out a bit
Maybe some H04 copper would be rigid enough.
 
Maybe some H04 copper would be rigid enough.
Hmmmmm. Idk what that is…. Maybe that’s what my stab is already made from…. Im not a metallurgist hahahaha


Hmmmmm full hard copper. Yeah. That would probably work! Maybe I need to figure out how to give it a Rockwell hardness test
 
I decided to remove the battery and tray and use the ground underneath them. Was easier than I thought it was going to be.
 
Here you go boys. Finally got the harness installed. Used a bolt on the fire wall for the ground. Fed it around all the wires above the upfitter box. Connected all the Aux leads, rang them out with the switches to make sure I had everything connected correctly. Didn’t use the solder connectors, couldn’t figure out how they worked. Had a bunch of 10-12 gauge marine crimp connectors, they worked great. Did not connect the PTO leads, not sure what I would use those for. Harness lays easily right on top of the grey fuse box, with room to move around to get to the fuse box.

Next up Limitless Strobes front and rear, BMC hitch lights and a front light bar. Hopefully all before hunting season.
 

Attachments

  • IMG_4207.webp
    IMG_4207.webp
    164.5 KB · Views: 173
  • IMG_4206.webp
    IMG_4206.webp
    231.8 KB · Views: 172
I just installed mine as well and it is a really great addition. I used the grounding bolt on the fender and the harness had plenty of length to reach it. I found it much easier to remove the up fitter relay assembly and make the connections on my bench rather than in the engine compartment (in the sweltering summer heat). Right after that I installed my BMC mini hitch bar lights in the back (pics forthcoming in another post) and I smiled as the concern about which upfitter switch to connect them to is all gone. I can move the connections and reorder them at will which will be important as I add accessories and see what logically works for me. Great job Cblaxx19!

One other note - you can see the battery acid seeping out of the top of the battery. I was in for some service after this and Ford not only replaced it they did the drivers side battery as well (without me even asking) That makes 2 batteries for the passenger side and 3 now for the driver's side. Ford obviously knows these are a bad batch and the new ones have a different label on them. Hopefully they did something to correct these leakers. I will update this on the battery thread when I get some pics of the new ones.
 

Attachments

  • IMG_3983.webp
    IMG_3983.webp
    357.7 KB · Views: 145
View attachment 161611
View attachment 161612
View attachment 161613
Well that couldn’t have worked out better! Strut sits nicely in between the bolts. I haven’t tested it but I can’t imagine it wouldn’t be a fantastic ground. As someone else mentioned there is a grounding lug or two right on the fire wall as well if you wanna stretch the cable that direction instead! But for me, an engineer who likes to over complicate and build things, this couldn’t have worked out better!

Hey, why not do this instead, am i missing something important, why not just route it in the opposite direction run it a few inches behind the frame. I just tried it now, seems to achieve the same goal.

I do see that bolt everyone else reverted to on the firewall/back side, but if this is truly a ground hook up, it is certainly a lot easier to hook up to this bolt.


IMG_3114.webp
 
Last edited:
Finally got mine installed over the weekend. Really well made, Ground could have been a touch longer but it worked out fine, as I ended up terminating at the battery. Future electrical editions will be easy peasy. Not sure why ford decided to shove the upfitter box into where they did, other than to save a few bucks on wiring. Oh well. Appears that is an Ok place to ground still? I didn't see the ground lug pointed out in the discussion, even though it was right in front of me the whole time. Not sure I'll bother to change it as everything seems to be in a good place and I can still get to the upfitter fuse box without moving anything. Ground went between battery and upfitter fuse box and terminated on battery lug.
wiring 1.webp
wiring 2.webp
 
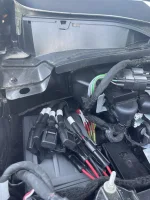
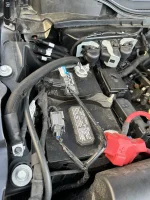
I started working on electrical this morning and decided that i’ll feed the ground from two spots, because why not... I tested them individually and together to ground properly.

IMG_3140.webp

IMG_3141.webp

IMG_3142.webp
 
I started working on electrical this morning and decided that i’ll feed the ground from two spots, because why not... I tested them individually and together to ground properly.

View attachment 164569
View attachment 164570
View attachment 164571

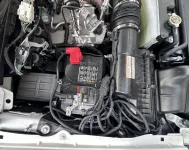
The electrical hook up is done and tested now i just have to clean it all up and on to the fog bracket installs.

Since i had 4 harnesses and 2 (10 gauge) grounds all coming together i needed a big ass connector to make it work; luckily i had just one and i used it (the big blue). Will rewire ground once i get a 5 port Wago one.

IMG_3146.webp

IMG_3150.webp
IMG_3148.webp

IMG_3149.webp
 
The electrical hook up is done and tested now i just have to clean it all up and on to the fog bracket installs.

Since i had 4 harnesses and 2 (10 gauge) grounds all coming together i needed a big ass connector to make it work; luckily i had just one and i used it (the big blue). Will rewire ground once i get a 5 port Wago one.

View attachment 164577
View attachment 164578View attachment 164579
View attachment 164580
What are those orange lights in the grill? Are they individual?
 
The electrical hook up is done and tested now i just have to clean it all up and on to the fog bracket installs.

Since i had 4 harnesses and 2 (10 gauge) grounds all coming together i needed a big ass connector to make it work; luckily i had just one and i used it (the big blue). Will rewire ground once i get a 5 port Wago one.

View attachment 164577
View attachment 164578View attachment 164579
View attachment 164580
Looking good. And two grounds for this setup is a great idea.
 
Looking good. And two grounds for this setup is a great idea.

Once i cleaned it all up, cut all the excess wiring from diode dynamics harnesses it looks OK now. I was worried there will be no space to store all the harnesses and relays, but they are tucked away nicely between the battery and air filter housing. I now have all 6 up-fitters wired up.
 

Attachments

  • IMG_3154.webp
    IMG_3154.webp
    334.9 KB · Views: 101
Back
Top Bottom