- Dec 21, 2021
- 1,657
- 3,640
- 2022 7.3L F250
- Assorted vintage trucks, motorcycles, and bicycles.
Just a heads up, make sure it's polished chrome and not satin chrome.Was able to get the part number for a platinum JC3Z 2522 404DDPT
Follow along with the video below to see how to install our site as a web app on your home screen.
Note: This feature may not be available in some browsers.
Just a heads up, make sure it's polished chrome and not satin chrome.Was able to get the part number for a platinum JC3Z 2522 404DDPT
Good call, honestly I’m not sure what’s accurate. Both of these numbers show a fit. Which one is polished?Just a heads up, make sure it's polished chrome and not satin chrome.
I'm not getting any hits on those part numbers from a quick search.Good call, honestly I’m not sure what’s accurate. Both of these numbers show a fit. Which one is polished?
JC3Z 2522 404DDPT
JC3Z 2522 404EDPT
My hero!! TyI'm not getting any hits on those part numbers from a quick search.
What I did get searching the first one (404DDPT) was, JC3Z-2522404-KDPTM, which Tasca Parts says is satin chrome.
The F150 part number I gave you is for sure a fit on my 2022 SD. It has an unfinished slightly textured black plastic base with a polished chrome passenger side keyless entry handle. I have the handle cover on both of my original painted base front door handles and it is a perfect fit.
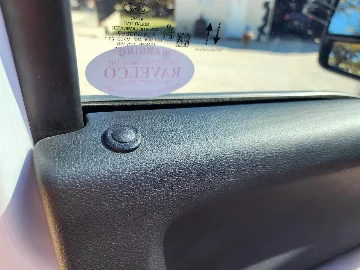
View attachment 125308
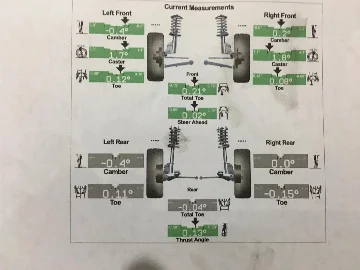
View attachment 125309
View attachment 125310


Yes, quite easy actually.Has anyone figured out a way to do this swap without cutting the locator pin on the door skin? This sounds dumb, but I have reservations with cutting or bending sheetmetal to make it work.
You order the passenger handle, remove the door pull part. Remove the driver side handle assembly, remove the handle with key hole. Of course this is not a step by step "how to" replace with the new passenger handle only after you get it color matched. You flip the retaining pins. Just had mine done. It was about a $400+ mod, but l like it.Yes, quite easy actually.

Your choice, but as I remember in your initial thread you said something like, "it was way more work and involved than I anticipated," not to mention having to alter the driver door to accept the entire passenger handle.I cut mine because I used the entire handle from the passenger side as a whole. I didn’t pull any pins either.
I have a great writeup in my build thread.
It was more work than anticipated because all other forums that talk about it leave out key details and lack of photos.Your choice, but as I remember in your initial thread you said something like, "it was way more work and involved than I anticipated," not to mention having to alter the driver door to accept the entire passenger handle.
I was not the one who did my swap, but I watched the entire procedure. From removing the door panel, to replacing it, with new handle in place was 20 minutes. You also had the benefit of the paintwork being done at the same time as a scratch from shipping was painted which saved money. There is no need to have to paint the handle and backing plate, just an extra part to worry about color match.
As far as flipping the pins, thats only because when you invert the new handle (passsenger) the pins are upside down and could fall out otherwise not necessary. This is also very easily done. So why cut on a door if it's not necessary.
If Ford would sell the pull part of the handle as a single piece, this modification would be totally routine.
It was more work than anticipated because all other forums that talk about it leave out key details and lack of photos.
The MCS seat writeup from @DriftwoodTremor is a great example of how a writeup should be done.
The knurled pins won’t fall out, they’re pressed in hard
Agreed, on write ups. You are extremely knowledgeable, myself and others have benefited too many times to count. You are an asset to this forum. I compared to you know nothing. But what I do know is it seems when a easier simpler process is found, you sometimes take issue with it.This is one of those times. No, my write up does not come close to what you produce, but i put it out there because the guy asked if he had to cut up his door.I don't understand that. Now I will stop and show you the respect you have earned.It was more work than anticipated because all other forums that talk about it leave out key details and lack of photos.
The MCS seat writeup from @DriftwoodTremor is a great example of how a writeup should be done.
The knurled pins won’t fall out, they’re pressed in hard at the supplier.
Thanks, so you also separate the black face plate from the white section to get the holeless base? Guessing it’s those 4 friction washers at the corners?Absolutely no cutting. You are only using the pull part of the handle, the base plate on the driver side is utilized, although it has to be R&R to install the new key hole "less" part from the passenger side.
Ah got it now! So basically removing Cylinder and swapping handles correct?Not totally clear on what you are asking? Are you talking about the hole that is left that previously the lock cylinder occupied? If so you snap in a 1 inch plastic hole cover.

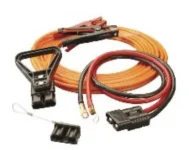
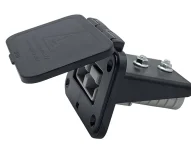
Finally got security locked down, curious if anyone can help me figure out how to access the battery’s or jump start should the batteries die? I’ve seen some stuff on the forum about Anderson plugs, but I don’t understand it and the setup I need to buy, Grateful for any help.


Here is a link to what I did for battery access. Hope it helps buddy and let me know if you have any questions.Finally got security locked down, curious if anyone can help me figure out how to access the battery’s or jump start should the batteries die? I’ve seen some stuff on the forum about Anderson plugs, but I don’t understand it and the setup I need to buy, Grateful for any help.
 www.fordtremor.com
![What did you do to your Tremor today? [2025 edition]](https://www.fordtremor.com/data/files/featured_images/featuredimages_thumb_1.webp?1790218334)


![What did you do to your Tremor today? [2019-2024]](https://www.fordtremor.com/data/files/featured_images/featuredimages_thumb_4.webp?1790218335)