Project Shadowfax

Today was some preventative maintenance on Shadowfax around the batteries, running boards, and side-rear steps.


First up, the batteries. I’ve noticed a persistent wet patch on top of the batteries. I suspect it’s battery acid, so I wanted to get ahead of the corrosion that will inevitably follow.

Picked up some CRC battery cleaner and terminal protector from Grainger and applied it. Super easy, but should protect things while these batteries are alive. They’ll be replaced with AGM when they hit end of life, which should eliminate the need for this.

This video from CRC is well put together and explains how to use both products:


I’ll be repeating this procedure every oil change unless things truly look spotless and the terminal protector is still throughly red.

I also checked the water level in the batteries and it was good.


Next up was applying Fluid Film to the moving bits of the power running boards, Amp Research side steps, and rear corner step. Goal is to get ahead of any long-term corrosion, and I plan on repeating this yearly.

This video from FordTechMakuloco was a significant motivator to do this:


This was my first time working with Fluid Film and boy does it stink! I wasn’t using large amounts of it, was outside, and it still smelled like crazy. But apparently it works, so it’s a small sacrifice lol.
 
Last edited:
Soak your frame, axles, steering components and suspension down with that before each winter and mid winter on a warm day as it washes off over time. We had a warm day today, I cleaned my truck and soaked the bottom side down with fluid film for mid winter. I’ve been doing this to every truck I’ve owned and I have never had a rust issue. Obviously ford has aluminum bodies, but the other parts will rust so soak them down and don’t forget to get behind your rear bumper where the grime collects.
 
Soak your frame, axles, steering components and suspension down with that before each winter and mid winter on a warm day as it washes off over time. We had a warm day today, I cleaned my truck and soaked the bottom side down with fluid film for mid winter. I’ve been doing this to every truck I’ve owned and I have never had a rust issue. Obviously ford has aluminum bodies, but the other parts will rust so soak them down and don’t forget to get behind your rear bumper where the grime collects.
Huh, so you just slather it on everything? Not just moving bits?
 
Today was some preventative maintenance on Shadowfax around the batteries, running boards, and side-rear steps.


First up, the batteries. I’ve noticed a persistent wet patch on top of the batteries. I suspect it’s battery acid, so I wanted to get ahead of the corrosion that will inevitably follow.

Picked up some CRC battery cleaner and terminal protector from Grainger and applied it. Super easy, but should protect things while these batteries are alive. They’ll be replaced with AGM when they hit end of life, which should eliminate the need for this.

This video from CRC is well put together and explains how to use both products:


I’ll be repeating this procedure every oil change unless things truly look spotless and the terminal protector is still throughly red.

I also checked the water level in the batteries and it was good.


Next up was applying Fluid Film to the moving bits of the power running boards, Amp Research side steps, and rear corner step. Goal is to get ahead of any long-term corrosion, and I plan on repeating this yearly.

This video from FordTechMakuloco was a significant motivator to do this:


This was my first time working with Fluid Film and boy does it stink! I wasn’t using large amounts of it, was outside, and it still smelled like crazy. But apparently it works, so it’s a small sacrifice lol.
If you still have the stock batteries might as well get ahead of it and switch em out. They sound ready to go boom.
 
If you still have the stock batteries might as well get ahead of it and switch em out. They sound ready to go boom.
Yep, stock batteries.

If that was the only thing I was looking at I would agree, but it’s not. They still have lots of water and I’m testing them every 5000 miles (roughly every quarter in practice). They’re still testing great as of just before the holidays.

Anything is possible, but I’m going to wait for another sign they’re failing before dropping ~$600 on AGM’s.
 
I sold my stock batteries for 200 but probably could've got more. They were one month old.
Yep, stock batteries.

If that was the only thing I was looking at I would agree, but it’s not. They still have lots of water and I’m testing them every 5000 miles (roughly every quarter in practice). They’re still testing great as of just before the holidays.

Anything is possible, but I’m going to wait for another sign they’re failing before dropping ~$600 on AGM’s.
 
Between yesterday and today, Shadowfax got 3 new Gatorback mud flaps in gunmetal! First picture shows the factory flap on the front, second the new flap. Third picture shows the rear.

View attachment 53679
View attachment 53676
View attachment 53678

Why only three you may ask? Well, turns out I have some leftover damage from the deer hit in the form of some bent metal on the drivers side. That prevented a bracket from fitting properly. Once that's fixed I'll install the last flap, but in the meantime I've reinstalled the factory flap so I'm still legal.

Thread where that was discovered is here:


And you can follow along for updates on the fix if you want here:


As for the mud flaps: I love the look and quality of them. Gunmetal is the perfect color for the blackout package IMO. They are also heavy duty and premium. Admittedly, they should be for the price! Only reason I went with them is to spend Ford Pass Points I had earned through servicing my old truck and the purchase of the new truck. I'm excited to see how they hold up over time.

Some notes on the install:
  • Here's the install videos:
    • Front:
    • Rear:
  • Be sure to utilize both the install videos and the written instructions. I found I was mostly using the videos, but there were a few key steps where the written instructions clarified things.
  • Pay careful attention to whether their instructions are for a truck with or without flares and with or without liners. One time I didn't notice they had swapped back to talking about trucks without flares and went down a rabbit hole.
  • Front install was relatively straightforward, just a decent number of steps. Only thing that was confusing is the sheet metal screws you're provided to attach the flap itself to the bracket come in two sizes: short (one per side) and long (3 per side). None of the instructions clarified where the short screw goes. Quick call to the company sorted that out. Short screw goes in the only hole that doesn't have the strip washer in front of it.
  • Rear install is a bit of a bear if you have the OEM liners (and possibly third party liners?), excluding my bent sheet metal.
    • The retainer pins holding the liner in place are large and suck. I totally mangled one, and the others definitely saw some damage. In another thread it was worked out that the part number for those pins is: W715272-S300
    • In the video they imply you can easily bend the liner out of the way to get access to things behind. Perhaps this was true in previous model years, but with my truck the liners are stiff and pretty well locked into place. I could barely get the lower expansion nut out where you have the most flexibility, but then they want you to remove a bolt higher up. Plain and simple: there was no way I was going to fit a ratchet, socket, and unthreaded bolt up there. And a standard wrench would have taken forever.
    • After some fighting with things, then humming and hawing I figured out a workaround. Ultimately they want you to drill a hole through the liner. Their steps have you remove that upper bolt so you can stick a pick/awl through the bolt hole and punch a pilot hole through the liner. Instead, I stuffed a small right-angle pick up against the face of the bolt and pushed my pilot hole through. From there I was able to hold the liner out far enough to drill my larger hole with a stepped drill bit. Drilled it large enough to squeeze my 10mm socket through and get to the bolt so I could remove it. The larger hole isn't a problem as it's covered entirely by the front bracket, short of a bolt going through it.
    • The curved piece of metal that the rubber flap directly attaches to was curved too much, and wouldn't fit between the flare and fender flange without putting a ton of pressure on the bottom of the flare. I un-curved it over my knee a few times so it fit dramatically better.
Parts list:
 
@xxflyingturtlexx to make sure, in your last post here, did you intend to quote my post and not add anything? Or did something happen to wipe out your comments?
 
Today Shadowfax got two new modifications.


First up was wrapping cord around the antennas on the roof to eliminate whistling. Bring whip antennas, they loved to whistle. Especially if the air was “thick” (fog or rain). Researching it, discovered this is a solved problem and all the OEM antennas have the solution:

Wrap wire or cord in a spiral along the length of the whip! Can do this with some small cord and use heat shrink to hold it in place.

I have no idea why aftermarket antennas don’t do this by default, but at least it’s easy to do. No pictures, but used basic cord and purchased heat shrink from:


Purchased from them due to their selection and prices for smaller quantities.

It worked perfectly so far. As long as it holds up, I can finally drive in some quiet!


Next up was installing the drivers side footwell vent diffuser from @gord1895. If you haven’t seen the main thread for their product, check it out:


Quoting what it is:

This winter has been a pretty brutal one here in Montana. This is my first winter with my Tremor and coincidentally my first time driving a vehicle where my feet were always COLD! Went through the standard internet dive, looking for common problems. Didn't seem to have any blend door issues or blockages. I came across some info finally and was able to confirm it myself. It appears Ford built the heat duct for the drivers side horizontally and the exit is far too high up. This causes a condition where the heated air shoots out well over your feet and goes straight to the left side of the footwell around the parking brake assembly. I set out to design a vent diffuser to redirect the air. I went through many iterations with tons of trail and error. I finally have something I was happy with and have been driving with installed for a few months. The results have been amazing.

My heat vent diffuser splits the air flow and aims it in a way that covers both feet in driving or resting positions. The install is very easy as I have modeled in holes and used rivets with rivet washers to place the diffuser over the existing exit hole. Some have used self tapper screws as well with good results.
I opted to install with 3M VHB as I had some extra from a previous project, which was super easy:

C1584F17-19E1-4BD3-AC7D-56D0414D4CE7.jpeg


Hopped in the truck and within about 10 seconds (truck was already warm, though I had been puttering around outside so I was chilled) I could feel the heat starting to come through my boot. Wild. @gord1895 hit it out of the park with this one!

Highly recommend the mod if you live somewhere that gets even mildly cold.
 
Yesterday got out for a forest road run with some friends. Was a great time, and since we found snow got a chance to test out the tire chains!

No pictures of it, but the first snow we encountered was on a fairly long and steep hill. Snow was slushy and probably 6-8 inches deep.

Friend in a Jeep Wranger JL on 35” KO2’s (no lockers) made it about halfway before losing all momentum and having to reverse back down. Seeing that, I didn’t bother trying without chaining up.

Opted to chain up all 4 tires. Install went pretty smoothly. Extremely glad I practiced in front of my house before doing it in the wild. Ended up not needing gloves since it was fairly warm, but having a tarp saved a lot of mud. Friend in the Jeep opted to only chain up his rear tires since his chains were being a major PITA to install.

Going up the hill again he hit a bit of a hole and got stuck. Had to be spotted around it and there was some wheel spin involved.

Shadowfax? Put him in 4WD low, threw on the locker, and crawled up the hill with zero drama. No will spin at any point. :D

Then we went off on a spur road and I tried to go through a snow drift. It did not go well lol. Completely buried myself and needed a winch backwards to get out. This one I did get pictures of.

IMG_0223.jpeg
IMG_0224.jpeg
IMG_0225.jpeg
IMG_0222.jpeg
 
Yesterday got out for a forest road run with some friends. Was a great time, and since we found snow got a chance to test out the tire chains!

No pictures of it, but the first snow we encountered was on a fairly long and steep hill. Snow was slushy and probably 6-8 inches deep.

Friend in a Jeep Wranger JL on 35” KO2’s (no lockers) made it about halfway before losing all momentum and having to reverse back down. Seeing that, I didn’t bother trying without chaining up.

Opted to chain up all 4 tires. Install went pretty smoothly. Extremely glad I practiced in front of my house before doing it in the wild. Ended up not needing gloves since it was fairly warm, but having a tarp saved a lot of mud. Friend in the Jeep opted to only chain up his rear tires since his chains were being a major PITA to install.

Going up the hill again he hit a bit of a hole and got stuck. Had to be spotted around it and there was some wheel spin involved.

Shadowfax? Put him in 4WD low, threw on the locker, and crawled up the hill with zero drama. No will spin at any point. :D

Then we went off on a spur road and I tried to go through a snow drift. It did not go well lol. Completely buried myself and needed a winch backwards to get out. This one I did get pictures of.

View attachment 116847View attachment 116848View attachment 116849View attachment 116850
Looks like a fun trip!
 
Time for another update! I know I’ve been slow with them, but slowly figuring things out.

This time it’s focused on the dash and installing the BuiltRight dash mount, along with mounting things to it.

The plan: have a piece of PVC pipe stretching the width of the dash that I can attach whatever I want to. Means I can have things at the far ends of the dash, all without drilling into it (other than the small holes for the center mount)

Ended up only getting the mount installed today because I bought 1/2” instead of 1” pipe. 🤦‍♂️ Will take about a week for the new pipe to come in, so will finish this install then.

Here’s what I have for now:

IMG_0357.jpeg


The power hub isn’t connected yet. That will happen with the electrical as I want it powered off of my accessories circuit.

The two arms will connect to, and hold, the PVC pipe. Goal is to keep the pipe as low as possible to minimize the impact to visibility.

Current plans for the pipe are:
  • Cell phone holder, between the instrument cluster and 12” screen. CarPlay has been amazing, but the mapping application we use for Search and Rescue doesn’t support CarPlay. That makes navigating on missions a pain with my phone sitting in the center console.
  • Garmin InReach mount to the left of the steering wheel. Means the InReach can have good reception at all times while I’m driving, as well as make it easily viewable so I know if I get a message.
  • 2-3 radio speakers. One towards each end, and possibly one towards the center. Uncertain the number as I’m still 100% finalizing my radio layout and thus what the built-in speakers will be capable of. Also considering putting the third under my legs on the Desert Does It seat mount.
 
The two arms will connect to, and hold, the PVC pipe
This will be a very interesting installation! Can you speak to the interface with the 1" PVC a bit more? Are those Ram mounts for 1" balls and will they spread to the OD of 1" PVC (1.315") or are you hard mounting to the pipe with another ball/stud or other method? Thx
 
This will be a very interesting installation! Can you speak to the interface with the 1" PVC a bit more? Are those Ram mounts for 1" balls and will they spread to the OD of 1" PVC (1.315") or are you hard mounting to the pipe with another ball/stud or other method? Thx
For sure! We'll start from the base and work upwards, then outwards.

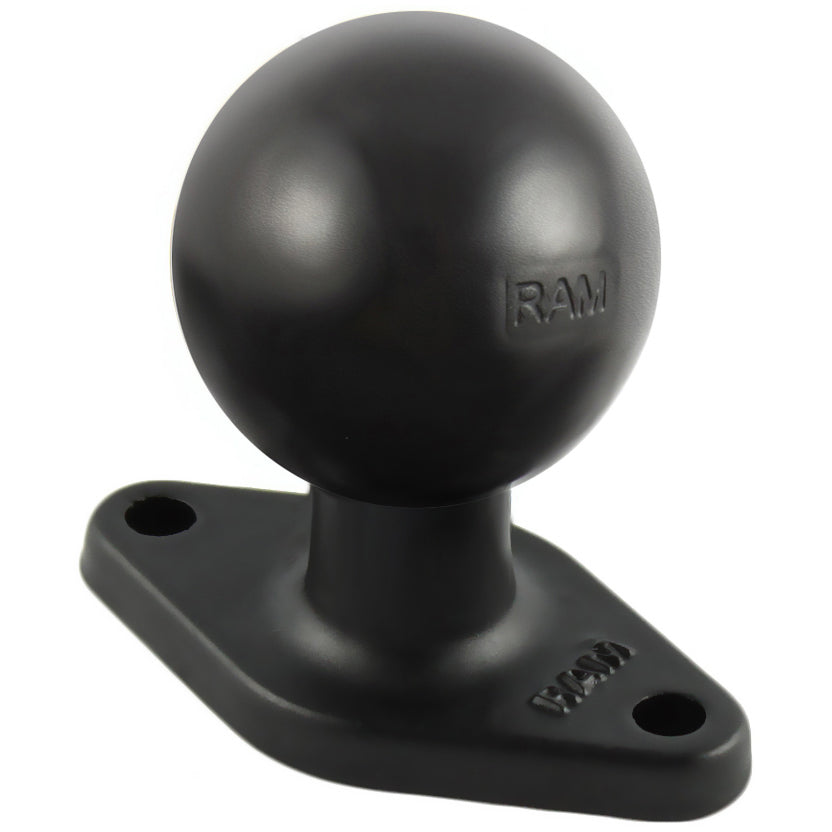
Onto the BuiltRight mount, I attached two RAM® Diamond Ball Base - C Size:


I chose the C size to have lots of weight headroom, since this is the foundation of the platform. While I'm not mounting anything super heavy to the PVC, I do intend to mount at the ends of the PVC which is quite a large lever.

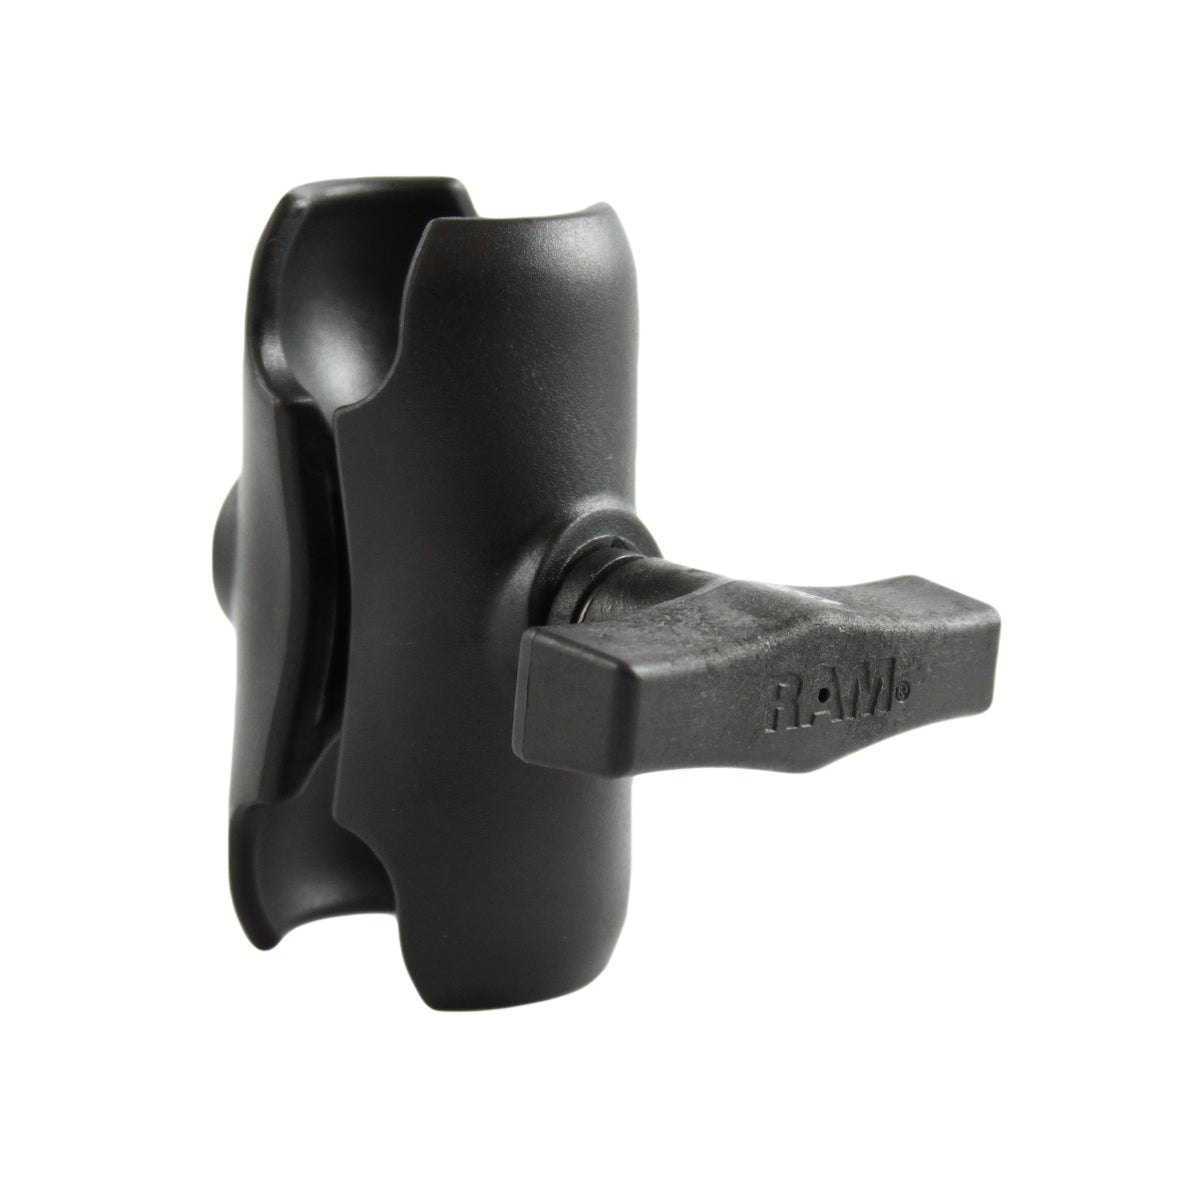
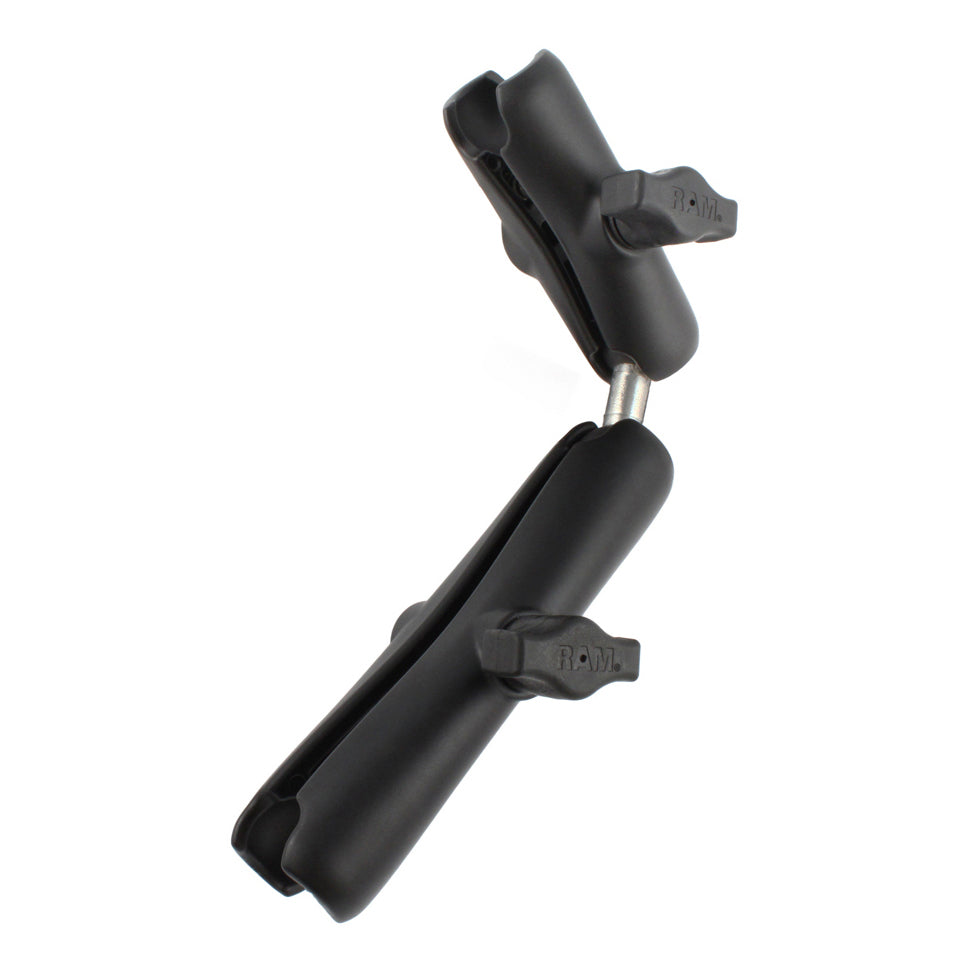
To each ball base I attached a RAM® Composite Double Socket Arm - C Size Short:


I went with the short arms as I want to keep the pipe as low as possible to minimize potential visibility obstruction.

(Above is what I've mounted to the truck so far, and showed in the picture in the previous post.)

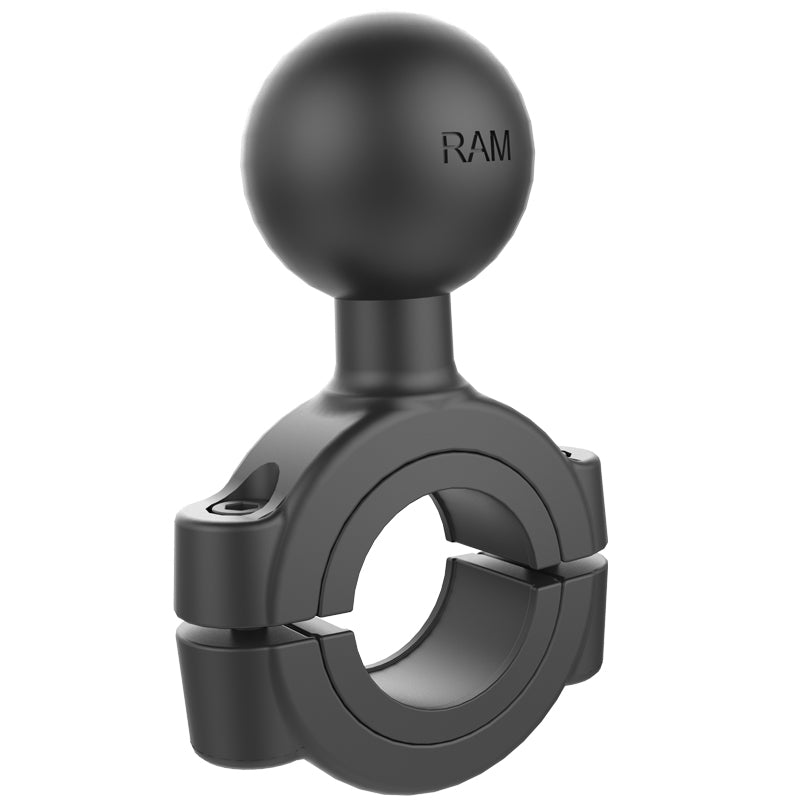
Next is two RAM® Torque™ Large Rail Base - C Size, which will mount to the pipe and the short arms:


These mounts were originally intended by Ram Mounts for handlebars and roll cages, but no reason they won't work with PVC pipe.

That has the pipe mounted, so next it's accessories. Each accessory is light, so to reduce weight, cost, and bulk I downsized to "B" sized balls and mounts.

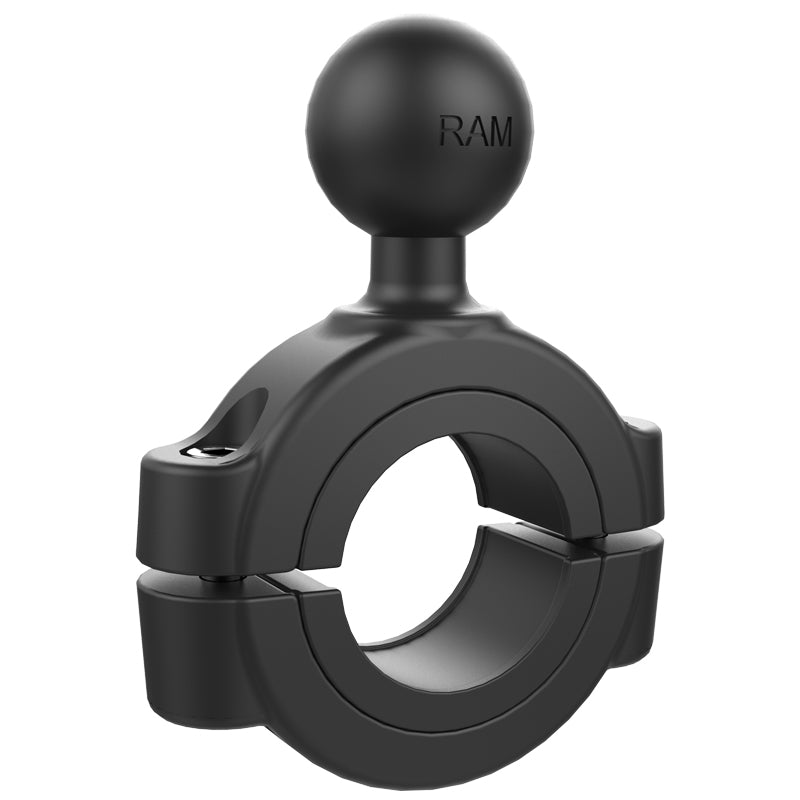
Each accessory gets a RAM® Torque™ Large Rail Base - B Size for the rail:


The phone and GPS mounts get RAM® Double Socket Arm Adapter with Medium & Long Arms - B Size, to have enough length to reach past the dash, as well as have some flexibility to follow the dash and reduce their height (again, visibility):


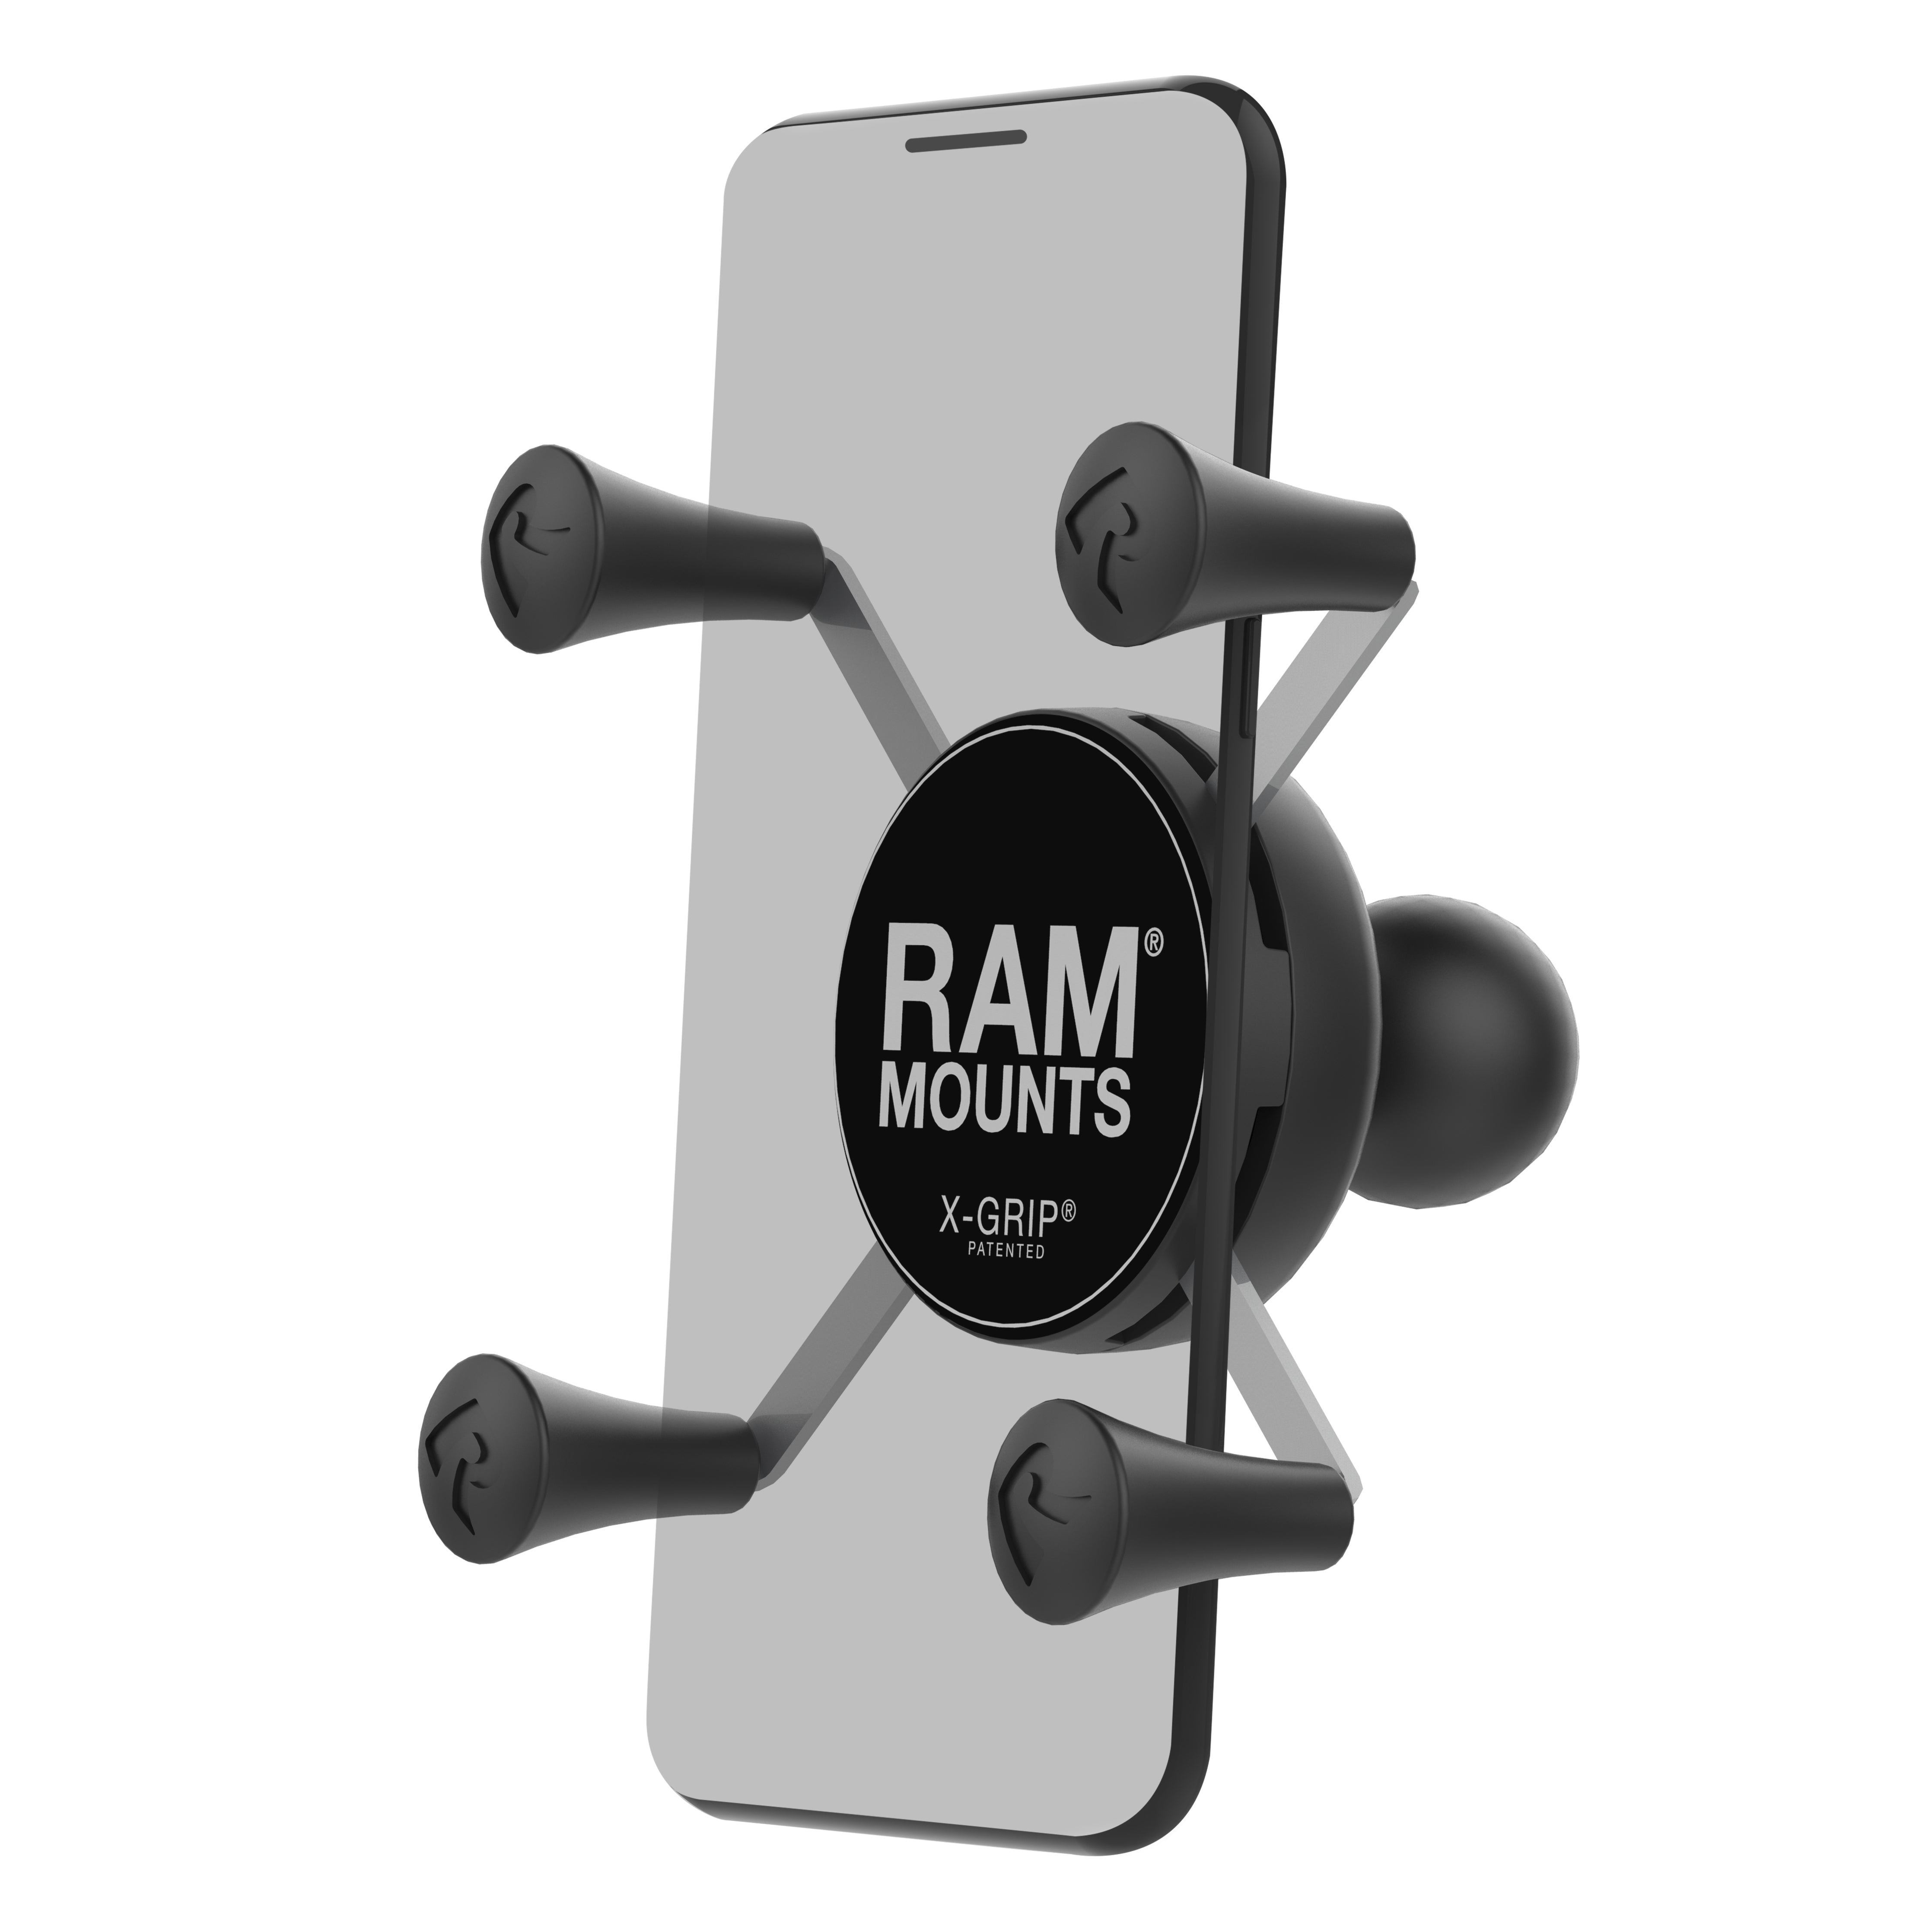
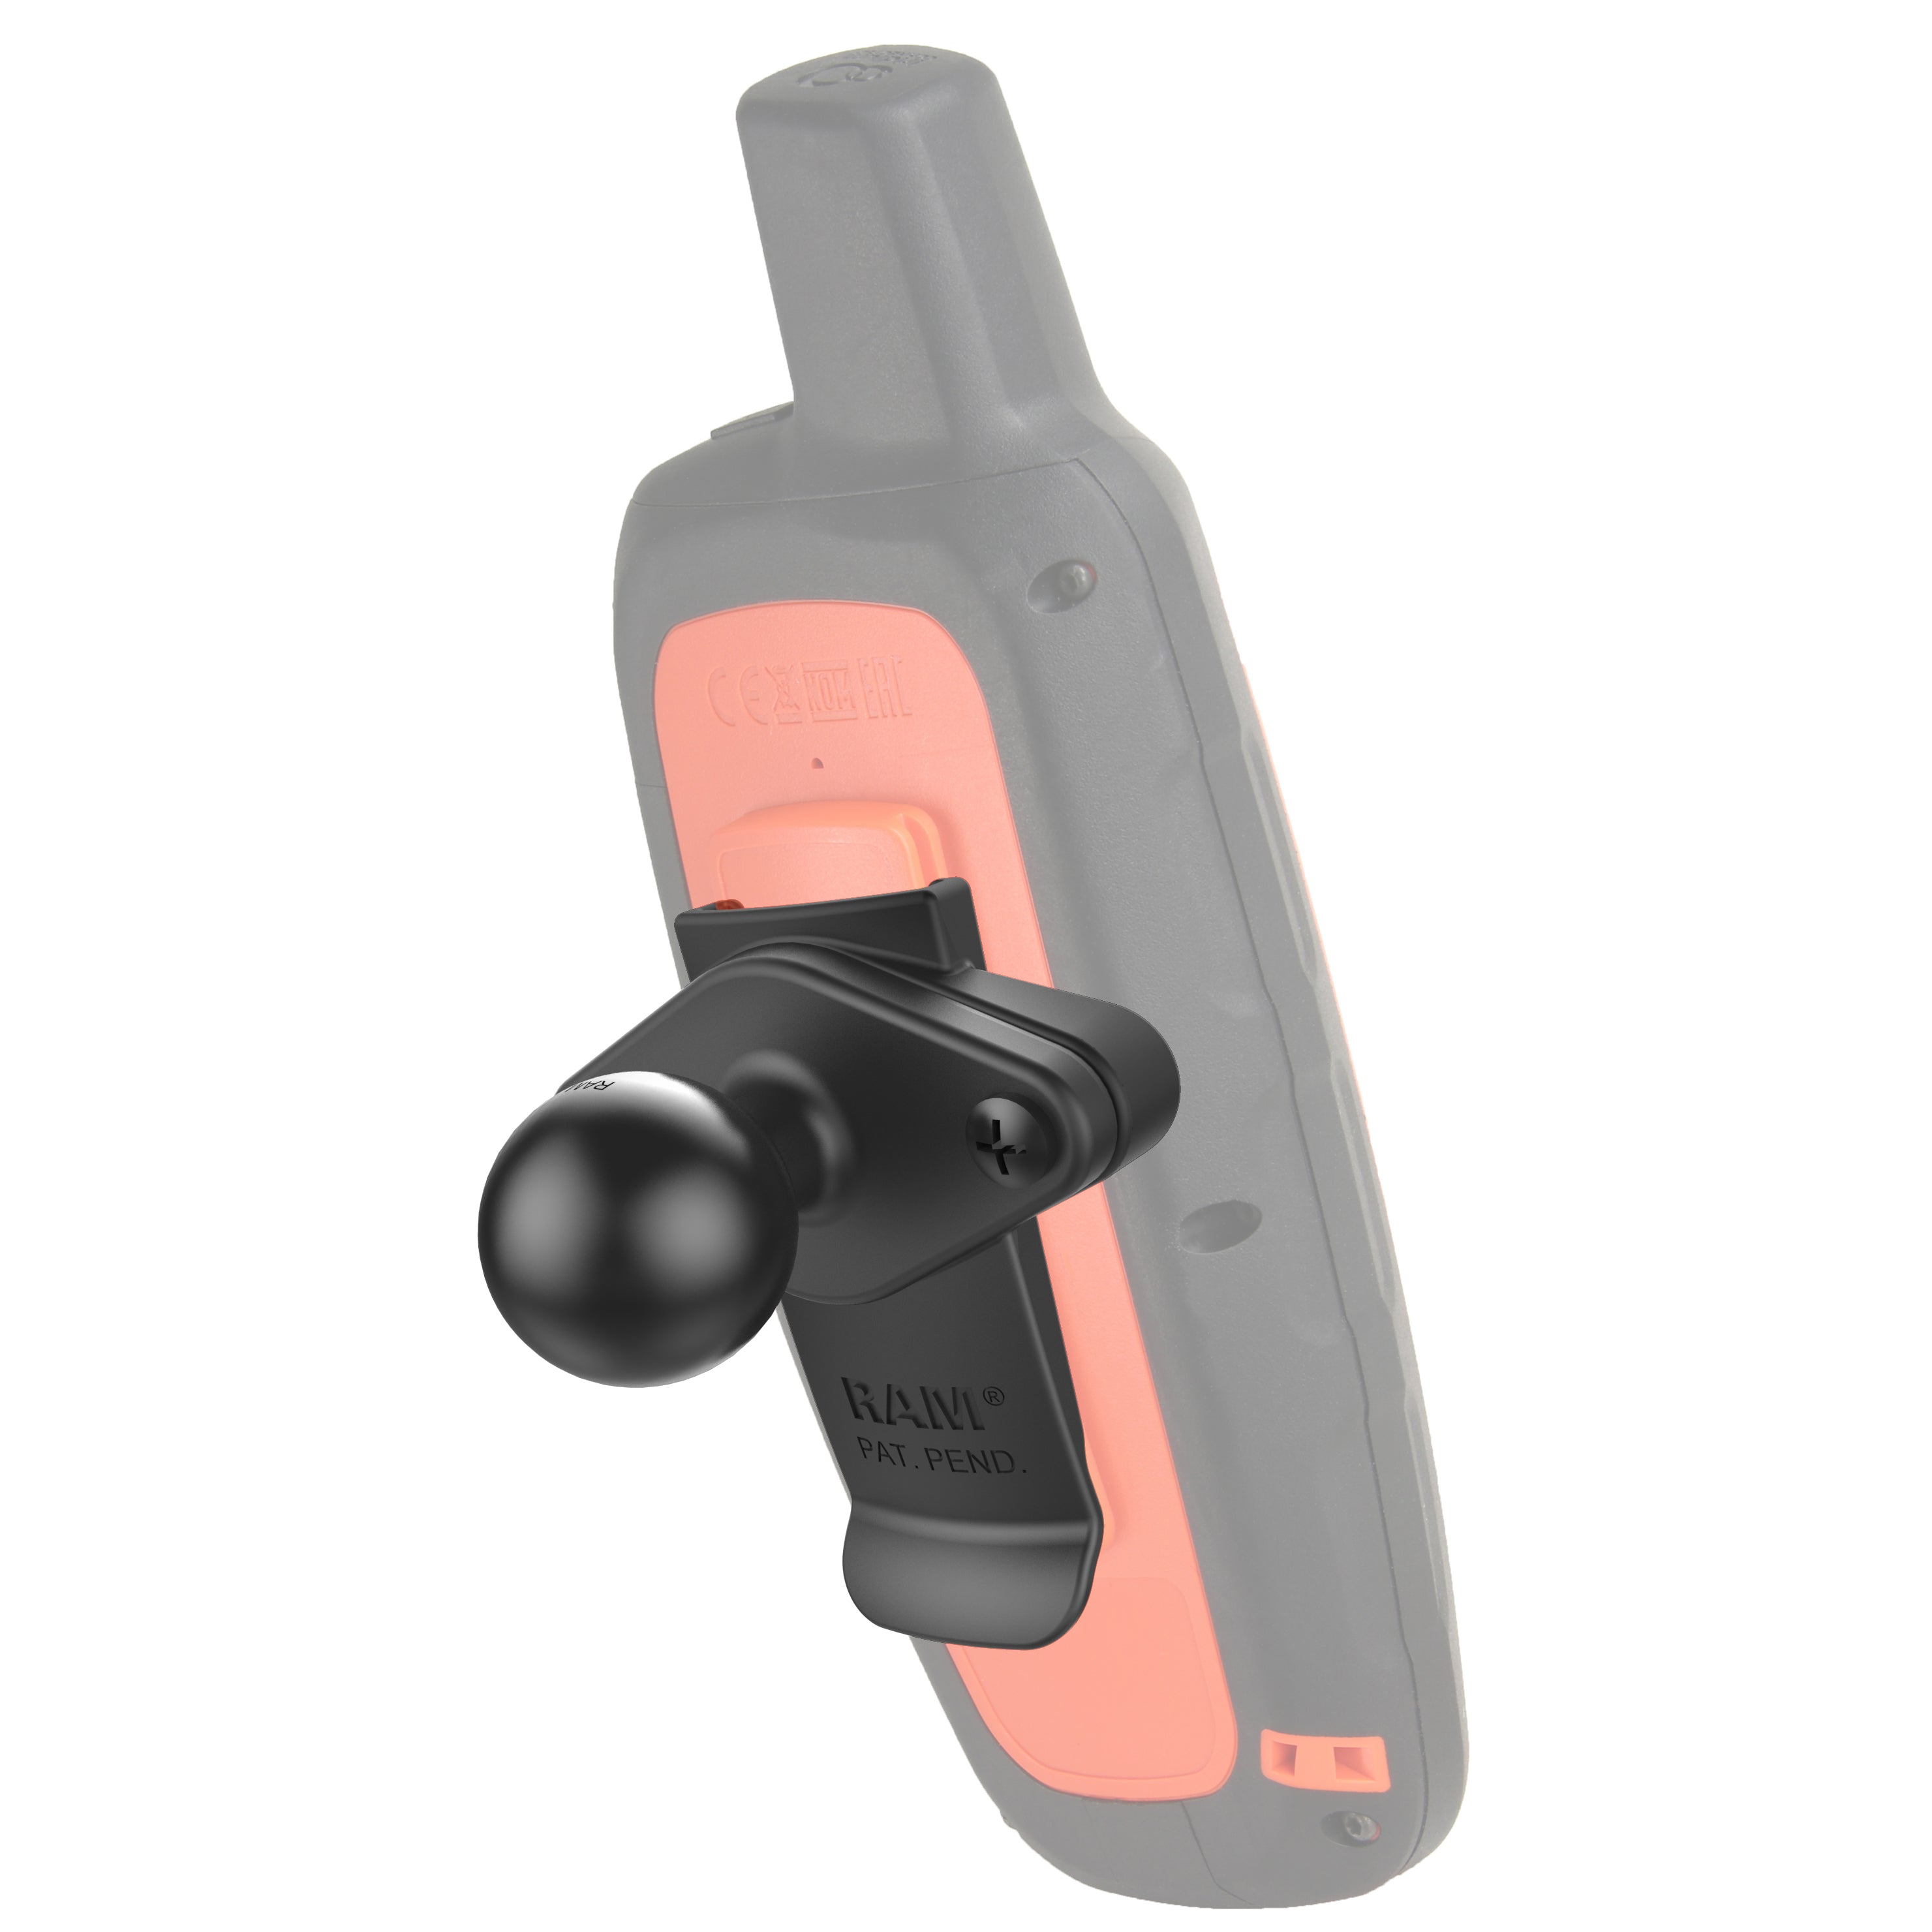
And lastly, the phone and GPS mounts to attach to those arms:


Worth noting I didn't get any Ram Mounts for the speakers yet. Strongly considering screwing those directly into the PVC, but we'll see.
Awesome! Thx for the detailed response! I'm using the ball mounts and double sockets and they are performing well as expected. I forgot about the torque tube mounts - that is a good idea...
 
  • Like
Reactions: ccw
So a bit of an update on my lighting plans. Originally I wanted the Baja Designs dual fog pocket light kit:


After living with the truck for a year and a half, though, I just don’t think I can justify the cost of the dual lights and am leaning heavily towards the single light kit:


That’s $700 less expensive! The LED headlights on the truck are fantastic. There’s no way I’m out driving them.

But I still want actual fog lights on the truck (factory ones don’t count) so the single is perfect. And less wiring to run, which is a bonus.

Throwing this out there before purchasing in case someone has a reason to spend the extra $700. But I’m just not seeing it right now.
 

Latest Discussions

Back
Top