Wolfbox G900TriPro Bumper Cam Install (Complete)

I had a similar experience, yet was fortunate having another SD card with the original firmware file and was able to recover the dashcam mirror - agree great customer service
 
I started getting things ready for my install this morning (I had to build a bracket and get wiring routes ready) and had a question for the group - There is a reverse voltage sensing wire in the camera wire - What does that do? I don't have an easy spot to tie into, and don't feel the need if it's not needed. Has anyone installed their camera and not hooked up the reverse sensing wire?

I have a feeling it's just for the reverse lines, which I don't need since I'm hooking up the factory reverse camera.

-
 
I started getting things ready for my install this morning (I had to build a bracket and get wiring routes ready) and had a question for the group - There is a reverse voltage sensing wire in the camera wire - What does that do? I don't have an easy spot to tie into, and don't feel the need if it's not needed. Has anyone installed their camera and not hooked up the reverse sensing wire?

I have a feeling it's just for the reverse lines, which I don't need since I'm hooking up the factory reverse camera.

-
The red wire just activates the rear view when you put it in reverse. And shows the gridlines.

I did not hook up the red reverse wire on my camera.
Since I use mine more as a rear view/cargo camera.
I'll just manual switch to the rear view if its not already on. Easy with voice control.
 
I had 3 reasons for installing this. 1) I dislike my current dash cam. 2) I need to see behind my camper. 3) My dash is getting cluttered.
The G900 with replace the dashcam, rear view monitor and rear view mirror.
And the G900 will provide a rear view even when loaded with a truck camper. Intuitive and kind of cool.

View attachment 232077

First thing about the install. Plan ahead. This is a wired system. Lots of wires.
You'll have to pull apart a lot of the trim to route wires. Don't think you'll get this all done in 1 day.
Most of them have 90 degree connectors so they are tricky to fish through places.
I had to remove my old dashcam, so when I pull the old wires, I tied string to them.
This way I could use the string to pull the new wires through.
This kind of worked, but not as well as I'd hoped. I still ended up taking a lot of trim off.

View attachment 232082

Mounting the G900 is easy. #1 bracket directly replaces the stock rearview mirror.
Next I had to get power to the G900. This turned out to be a pain for no reason.
My old power converter mounted down by the fusebox.
The power wire running up behind the dash, up the A piller and across the top of the windsheild.
However the G900 didn't have enough length to do the same.
And when I pulled it, it went up behind the dash and got stuck.
2 freakin hrs trying to get it back out.
If you've ever had to futz with the passenger side fusebox, you know what a mess it is in there.
Finally got it out and mounted it in the A piller.
Not the way I wanted to do it, but I guess it works and it's much easy to get to.
Mounted the GPS receiver next to it on the dash.

View attachment 232084

Then ran the wire to the rear view camera. That was fairly easy.
It's a long wire and there is a ton of extra. I considered cutting it shorter.
But in the end, I just tucked it up behind the side air bags.
Make sure you get it behind the airbags.
Would suck if they went off and took the wires and G900 with it.

View attachment 232083View attachment 232081

Now if you're still with me. Here comes the cool part.
Mounting the rear view camera inside sucks. My old dashcam had a great rear camera.
With the G900, there's no easy way to mount it. So it's 3D print time.
I designed and printed my own rear view mount. (Ok, I did get some design hints from another mount.)
Here's a few test iterations trying to work out the dimensions & the final mount.

View attachment 232091

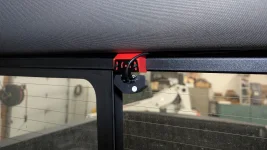
It simple slips up behind the headliner and the camera mounts with 2 screws.
2 minutes max to mount, easy to remove. And the image is perfect.
Can see in the bed, behind and beyond. Will print a final one in flat black later.
I may end up making a couple other variations for alternate mountings.
And as always, anything I design will be free for anyone to download & use.

View attachment 232085View attachment 232086
Looks great! What phone mount do you have for the dash? I'm looking at 3D printing one out of CF.
 
Looks great! What phone mount do you have for the dash? I'm looking at 3D printing one out of CF.
It's a builtright dash mount, then a 3 inch ram arm ball mount to a quadlock adapter that I 3D printed.
 
It's a builtright dash mount, then a 3 inch ram arm ball mount to a quadlock adapter that I 3D printed.
Awesome! Thank you!

I just got my Wolfbox installed. Mind sharing the print files for the rear cam? I need a better solution, sticking to the roof won't hold up in the Texas heat haha.
 
Awesome! Thank you!

I just got my Wolfbox installed. Mind sharing the print files for the rear cam? I need a better solution, sticking to the roof won't hold up in the Texas heat haha.
For additional help, that will require a small service charge of $20 to become a supporting member. Your fellow Texans deserve it! 🤪
 
Awesome! Thank you!

I just got my Wolfbox installed. Mind sharing the print files for the rear cam? I need a better solution, sticking to the roof won't hold up in the Texas heat haha.

Rear window mounts for anyone who wants them:

PXL_20251028_222251250.webp
 
Has anyone used the front camera in the rear as a second rear camera? Or used the front camera and can they think of why that wouldn't work? I know that seems weird, but with my specific situation, I can either mount the camera down low and see the hitch, or up high and see the road/traffic. I'm thinking that if i get the next stage with 3 cameras, I can just install one high and one low. The truck already has the front camera in the dash.

Edit - With my specific setup, I have a flatbed and can't add the factory rear camera back in like I thought, so looking to have a hitch camera and rear traffic camera.

Here is a picture, but there's a rack on the back now. The two red circles are the two possible mounting locations.

1767401572214.webp


-
 
I had 3 reasons for installing this. 1) I dislike my current dash cam. 2) I need to see behind my camper. 3) My dash is getting cluttered.
The G900 with replace the dashcam, rear view monitor and rear view mirror.
And the G900 will provide a rear view even when loaded with a truck camper. Intuitive and kind of cool.

View attachment 232077

First thing about the install. Plan ahead. This is a wired system. Lots of wires.
You'll have to pull apart a lot of the trim to route wires. Don't think you'll get this all done in 1 day.
Most of them have 90 degree connectors so they are tricky to fish through places.
I had to remove my old dashcam, so when I pull the old wires, I tied string to them.
This way I could use the string to pull the new wires through.
This kind of worked, but not as well as I'd hoped. I still ended up taking a lot of trim off.

View attachment 232082

Mounting the G900 is easy. #1 bracket directly replaces the stock rearview mirror.
Next I had to get power to the G900. This turned out to be a pain for no reason.
My old power converter mounted down by the fusebox.
The power wire running up behind the dash, up the A piller and across the top of the windsheild.
However the G900 didn't have enough length to do the same.
And when I pulled it, it went up behind the dash and got stuck.
2 freakin hrs trying to get it back out.
If you've ever had to futz with the passenger side fusebox, you know what a mess it is in there.
Finally got it out and mounted it in the A piller.
Not the way I wanted to do it, but I guess it works and it's much easy to get to.
Mounted the GPS receiver next to it on the dash.

View attachment 232084

Then ran the wire to the rear view camera. That was fairly easy.
It's a long wire and there is a ton of extra. I considered cutting it shorter.
But in the end, I just tucked it up behind the side air bags.
Make sure you get it behind the airbags.
Would suck if they went off and took the wires and G900 with it.

View attachment 232083View attachment 232081

Now if you're still with me. Here comes the cool part.
Mounting the rear view camera inside sucks. My old dashcam had a great rear camera.
With the G900, there's no easy way to mount it. So it's 3D print time.
I designed and printed my own rear view mount. (Ok, I did get some design hints from another mount.)
Here's a few test iterations trying to work out the dimensions & the final mount.

View attachment 232091

It simple slips up behind the headliner and the camera mounts with 2 screws.
2 minutes max to mount, easy to remove. And the image is perfect.
Can see in the bed, behind and beyond. Will print a final one in flat black later.
I may end up making a couple other variations for alternate mountings.
And as always, anything I design will be free for anyone to download & use.

View attachment 232085View attachment 232086
Could I have the file for the print? Ill need to adaptor to fit in my Gladiator, but fingers crossed im winning one of these tomorrow lol(contest ends tomorrow)
 
Could I have the file for the print? Ill need to adaptor to fit in my Gladiator, but fingers crossed im winning one of these tomorrow lol(contest ends tomorrow)
Rear window mounts for anyone who wants them:

View attachment 240835
 
Is there an option from Wolfbox or after market to have remote live view from your phone???
 
Thinking about one of these for my GX. Once my rear bumper gets here, will have a spare blocking the view out the back hatch.
Everyone I have talked to loves the Wolfbox. May add one to the Tremor as well
 
Has anyone used the front camera in the rear as a second rear camera? Or used the front camera and can they think of why that wouldn't work? I know that seems weird, but with my specific situation, I can either mount the camera down low and see the hitch, or up high and see the road/traffic. I'm thinking that if i get the next stage with 3 cameras, I can just install one high and one low. The truck already has the front camera in the dash.

Edit - With my specific setup, I have a flatbed and can't add the factory rear camera back in like I thought, so looking to have a hitch camera and rear traffic camera.

Here is a picture, but there's a rack on the back now. The two red circles are the two possible mounting locations.

Curious about this too. Different camper but looking to something similar since my rear facing factory cameras are either gone or obstructed.
 
Curious about this too. Different camper but looking to something similar since my rear facing factory cameras are either gone or obstructed.
I just ordered the G900 "Tri" Pro - The new kit comes this Thursday. I'll report back in a week or so once I get a chance to finish the install. The second exterior camera does have a different connection (mini-jack vs usb-C), so I'll have to figure out which one is better quality for the higher mounted camera.

-
 
Mounting the G900 is easy. #1 bracket directly replaces the stock rearview mirror.
Could you explain how you mounted the mirror/camera unit? I assume it wasn't attached with the bands, but did you remove the original mirror mount and glue a Wolf mount onto the windshield? I'm just confused about what the OEM mounting solution requires.
 
Could you explain how you mounted the mirror/camera unit? I assume it wasn't attached with the bands, but did you remove the original mirror mount and glue a Wolf mount onto the windshield? I'm just confused about what the OEM mounting solution requires.

Your oem mirror is held on with a single torxs screw. Loosen that and it will pull off leaving a metal base that is bonded to the windsheild.
The wolfbox will come with a #1 bracket, that will bolt to the wolfbox rear view mirror. Then you just slip it over the oem metal base and tighten the lock screw. That's it. Once done it looks almost factory.

You can see the base here on amazon and some of the pictures there show how the mount works.

71JasGkmA3L._AC_SL1500_.webp
 
Your oem mirror is held on with a single torxs screw. Loosen that and it will pull off leaving a metal base that is bonded to the windsheild.
The wolfbox will come with a #1 bracket, that will bolt to the wolfbox rear view mirror. Then you just slip it over the oem metal base and tighten the lock screw. That's it. Once done it looks almost factory.

You can see the base here on amazon and some of the pictures there show how the mount works.

View attachment 245244
Thank you for this. I will link your post to the group buy thread. Great info!
 
Back
Top Bottom