That dog owns the world!
 and he doesn’t even know it!
Follow along with the video below to see how to install our site as a web app on your home screen.
Note: This feature may not be available in some browsers.
That dog owns the world!
and he doesn’t even know it!Did yours come with door protectors? Did you buy that antler? Is that a deer antler? My little boy gets elk antlers. He would get deer antlers if I could find any while walking through the forest.It does. Hooks around the headrests on the front and rear seats.
View attachment 243681
What motorcycles do you have? I have one for the dirt and one for the street.It does. Hooks around the headrests on the front and rear seats.
View attachment 243681
It didn’t come with the door protectors. The old truck in that photo didn’t have leather on the doors so they got water and a rag. They would be nice for the new truck!Did yours come with door protectors? Did you buy that antler? Is that a deer antler? My little boy gets elk antlers. He would get deer antlers if I could find any while walking through the forest.

KTM 400 XC for the dirt, Yamaha R6 race bike and Kawi ZRX1200 for fun. The Kawi is going through some restoration.What motorcycles do you have? I have one for the dirt and one for the street.
View attachment 243712


The second bike is the same in your profile pic!KTM 400 XC for the dirt, Yamaha R6 race bike and Kawi ZRX1200 for fun. The Kawi is going through some restoration.
Edit- new phone and couldn’t attach the 400 from Google Photos.
View attachment 243720View attachment 243719


I have a 20 but this is on my list of things that need to do.After discovering the ProClip mount was not going to handle the Garmin Tread 2 that Santa brought me, engineering exercise began.
Settled upon the BuiltRight in dash mount with support plate - making sure the Garmin has good support
Changed out the Garmin 1.5in ball mount for a 1" ball mount from a Zummo 660, making use of Trackform Mounting Systems https://www.tackform.com dual socket 3.5 inch mounting arm
Recommended tools which made install easier, Klein heavy duty ratchet crimping tool Klein 11063W automatic wire strippers, trim pad removal tool.
- To retain Gramin's 2 pin quick disconnect connecting to the Tread 2 mount, cut off the 12V accessory plug connector discovered there aren't a + and - wire they made it a coax cable so after minor surgery now have + and - leads spliced into 14 awg for connection to fuse block.
- BuiltRight has excellent install instructions and video.
- Removed lower glove box door and trim panel for access behind dash and lower fuse panel
- Protect your dash opening with blue printers tape, IMHO a must as it takes some force with trim tools to successfully remove center speaker and OEM dash mount.
- Dash mount assembly very straight forward, drilled pilot holes for the ¼ in drill bit. Then installed support plate.
- Note the front speaker grill is a very tight fit recommend not tightening dash mount lower bracket screws tight, having the speaker grill fit below the bracket, lining up its mounting clips
- Fishing the wiring behind the dash took some finagling - fishing it down past the screen mount to glove box area using a short piece of wire used that to fish down the positive and negative leads from dash mount.
- Used Blue Sea Systems 5045 fuse block with 3amp fuses, using fuse tap to connect to #13 on fuse block which is a switched fuse.
Thanks to @speeddev and @trmrzla for their wise counsel
Out of the truck on the bench
View attachment 244078
Support bracket installed
View attachment 244079
Mockup before installing dash mount
View attachment 244080
Fishing wire past screen mount and dash AC duct
View attachment 244081
Fishing positive and negative leads behind lower glove box
View attachment 244082
Fuse block location
View attachment 244083
Finished - screen visible line of sight not blocking big screen or AC vent
View attachment 244084

Nice!!After discovering the ProClip mount was not going to handle the Garmin Tread 2 that Santa brought me, engineering exercise began.
Settled upon the BuiltRight in dash mount with support plate - making sure the Garmin has good support
Changed out the Garmin 1.5in ball mount for a 1" ball mount from a Zummo 660, making use of Trackform Mounting Systems https://www.tackform.com dual socket 3.5 inch mounting arm
Recommended tools which made install easier, Klein heavy duty ratchet crimping tool Klein 11063W automatic wire strippers, trim pad removal tool.
- To retain Gramin's 2 pin quick disconnect connecting to the Tread 2 mount, cut off the 12V accessory plug connector discovered there aren't a + and - wire they made it a coax cable so after minor surgery now have + and - leads spliced into 14 awg for connection to fuse block.
- BuiltRight has excellent install instructions and video.
- Removed lower glove box door and trim panel for access behind dash and lower fuse panel
- Protect your dash opening with blue printers tape, IMHO a must as it takes some force with trim tools to successfully remove center speaker and OEM dash mount.
- Dash mount assembly very straight forward, drilled pilot holes for the ¼ in drill bit. Then installed support plate.
- Note the front speaker grill is a very tight fit recommend not tightening dash mount lower bracket screws tight, having the speaker grill fit below the bracket, lining up its mounting clips
- Fishing the wiring behind the dash took some finagling - fishing it down past the screen mount to glove box area using a short piece of wire used that to fish down the positive and negative leads from dash mount.
- Used Blue Sea Systems 5045 fuse block with 3amp fuses, using fuse tap to connect to #13 on fuse block which is a switched fuse.
Thanks to @speeddev and @trmrzla for their wise counsel
Out of the truck on the bench
View attachment 244078
Support bracket installed
View attachment 244079
Mockup before installing dash mount
View attachment 244080
Fishing wire past screen mount and dash AC duct
View attachment 244081
Fishing positive and negative leads behind lower glove box
View attachment 244082
Fuse block location
View attachment 244083
Finished - screen visible line of sight not blocking big screen or AC vent
View attachment 244084


I pulled a similar op as you, but with the front cover on. Not as detailed as yours.Task : Verify cold weather operation of various truck systems.
Environment : Overnight temps drop to high 20's, with a morning temp around 30*F
Pre-op : Plugged in the block heater at around 2100hrs. Outside temps around 35*F and dropping.
Pre-Deployment : Approximately 0645hrs, unplugged block heater, started motor, observed ECT sitting near 75*F+ with OAT reading near 22*F.
Enroute operations :
> Initial climate control settings HIGH with fan speed set to 4.
> Driving normal city speeds 45-55MPH = ECT climbing to over 130*F after which climate control system executes "NUCLEAR MELTDOWN COOLING PARAMETERS" filling the cab with heat.
> Approaching the interstate after 10+ minutes of driving = Overall vehicle operating temperatures approaching normal range; OAT=21*F ; IAT(MAF) = 31*F; CAC = 65*F
> Interstate driving 73+MPH : Operating temps in normal range given the OAT sitting in the 21-23*F range, cross winds pretty steady over 10-15MPH; IAT(MAF) = 35*F; CAC = 71*F
> Climate Control : Setting on HIGH with fan speed 3 seems to provide plenty of heat into cabin area sufficient to warrant a game of "Smoke Out" or "Freeze Out" (Driver's choice) without possible injury to personnel inside cabin area.
> Continued normal operations along route to mid-point objective : Nothing to report, all findings repeated from previous observations.
> Return to base deployment : Typical observations of IAT(MAF) slightly higher than OAT due to Boost PSI readings at/near/over 5PSI (this is considered normal) with the temp delta near 5-10*F over OAT. No significant effect to the CAC temp reading which ranged from 65*-72*F for the duration of the deployment.
Findings :
- Plugging in the block heater overnight gave reasonable heat to coolant system with regard to overnight temps.
- CAC operating normally given the low temps of 20*F+.
- Climate Control system HIGH heat can cook an average human being. Temp setting or fan speed setting crucial to preventing spontaneous human combustion.
- Driving in the cold most effects the "ride" feel with tires and shocks.
- Overall nothing out of the ordinary given the OAT.
However, I can say that heating system thermonuclear mode was engaged about 10 minutes sooner than without the cover.


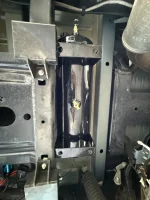
Have you noticed any issues just letting the bag rest? You have nothing connecting it to the bottom rest? I’m considering going the same route but with the pmf rear block with a dedicated airbag platform and I’m debating cradle vs just allowing it to rest on the platform.Airlift 5000 ultimate installed today. I did buy rough country cradles but couldn’t get them to work the way I wanted to I just ditched the lower attachment altogether and I’m letting the airbag rest directly on the lower bracket
View attachment 240766


Can you give some details about this setup? That is awesome!Solar panel on hood. Fook your smart charging algorithm
View attachment 242974