Project Shadowfax

I use the factory system as a backup to Google maps thus I can have 2 systems independent of each other & cell towers to figure out where I’m going

It’s paid off a few times
Interesting! That’s a neat idea! Though I’m not doing that with my truck as it would require a subscription. *grumble*
 
These trucks look even better with some mud on them!

197DD989-1805-4844-9D4C-4D89A515D284.webp
 
These trucks look even better with some mud on them!

View attachment 54373
Question, how come your priority 0 item is still there?:-) while i think ripping off the chrome trim piece is a complete wack job now that i have a truck, sanding and painting it black wasn’t that complex. Wrapping it shouldn’t be that difficult either, but i concluded that a good paint job is more durable.
 
Question, how come your priority 0 item is still there?:) while i think ripping off the chrome trim piece is a complete wack job now that i have a truck, sanding and painting it black wasn’t that complex. Wrapping it shouldn’t be that difficult either, but i concluded that a good paint job is more durable.
At first I thought you were talking about the front hubs, since they stick out more in this pic than the power running board's trim.
 
At first I thought you were talking about the front hubs, since they stick out more in this pic than the power running board's trim.
That too i figure is a 1 hour job on just the hub covers? I went for warn hubs otherwise would have painted them right away too. But i didn’t see the hubs in any of ccw’s priorities so i left it alone:-)
 
That too i figure is a 1 hour job on just the hub covers? I went for warn hubs otherwise would have painted them right away too. But i didn’t see the hubs in any of ccw’s priorities so i left it alone:)
I think I it took 3 hours to do mine, including removal time and Scotchbrite prep, then making a cardboard mask to push the hubs through and waiting for the 2 coats of primer and 3 coats of paint to dry IIRC.
 
I think I it took 3 hours to do mine, including removal time and Scotchbrite prep, then making a cardboard mask to push the hubs through and waiting for the 2 coats of primer and 3 coats of paint to dry IIRC.
Yes you’re right i say one hour but then i know that even the simple paint job takes time if you mask and prime and wait between coats. Nothing is quick if you want to do it right.
 
Question, how come your priority 0 item is still there?:) while i think ripping off the chrome trim piece is a complete wack job now that i have a truck, sanding and painting it black wasn’t that complex. Wrapping it shouldn’t be that difficult either, but i concluded that a good paint job is more durable.
Honestly, I haven't adjusted my modification priorities for a while lol and really need to revisit them. Priorities have shifted over time. The list of completed mods is up to date.

The chrome will likely come off, though, as I'm going to mount some amber light bars on the running boards for side lighting. Going to be used for SAR. Might mount the lights directly to the chrome? But I think that would look worse than on the black underneath.

At first I thought you were talking about the front hubs, since they stick out more in this pic than the power running board's trim.

That too i figure is a 1 hour job on just the hub covers? I went for warn hubs otherwise would have painted them right away too. But i didn’t see the hubs in any of ccw’s priorities so i left it alone:)

I think I it took 3 hours to do mine, including removal time and Scotchbrite prep, then making a cardboard mask to push the hubs through and waiting for the 2 coats of primer and 3 coats of paint to dry IIRC.

Yes you’re right i say one hour but then i know that even the simple paint job takes time if you mask and prime and wait between coats. Nothing is quick if you want to do it right.
Painting the front hubs is very low on my priority list. I don't mind the look of them as-is at all, and haven't really considered whether I prefer them blacked out. Probably do, but since I'm happy enough with them as-is I've got a lot of other things I'll take care of first. :)

(Like the electrical project. Which is now back to top of mind, and I almost have all the pieces to actually start on it.)
 
Interesting. Maybe it’s one of those things where it’s best to wait for it to cure, but not the end of the world if you don’t?
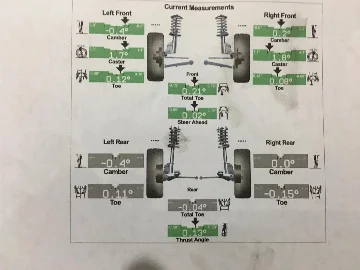
A follow up. We changed the front diff fluid together while i was getting my suspension tuned. Waited about an hour after setting the seal to pour in diff fluid. The mechanic was super surprised how useful that harbor freight pump turned out to be:-)

One interesting observation, he explained that i could have driven away without the front diff fluid and filled it the next day. The only way the front diff spins is when we engage the 4 wheel drive, otherwise it is not spinning, thus not working so you dont need it lubricated unless you use it. Something i didnt think about at all until he mentioned it.

Something else we agreed on. you told me that when you were installing your carli diff cover the fluid leaked, even briefly, technically your seal had to be broken. Think about it, if the seal was intact why would any fluid leak. It is possibly that when you tightened it, it sealed enough not to leak, but i’d still keep an eye on it.
 
One interesting observation, he explained that i could have driven away without the front diff fluid and filled it the next day. The only way the front diff spins is when we engage the 4 wheel drive, otherwise it is not spinning, thus not working so you dont need it lubricated unless you use it. Something i didnt think about at all until he mentioned it.
Oh duh. I totally already knew that but didn't connect the dots. Yep, as long as both the transfer case is in 2WD and the hubs aren't locked, then the front diff doesn't move. Good call!

Something else we agreed on. you told me that when you were installing your carli diff cover the fluid leaked, even briefly, technically your seal had to be broken. Think about it, if the seal was intact why would any fluid leak. It is possibly that when you tightened it, it sealed enough not to leak, but i’d still keep an eye on it.
In my case it never leaked. I'm just pretty sure it was mentioned in the instructions that it's possible for it to leak a tiny amount during install. That's a good point that if it does leak at all the seal has inherently been compromised.

Glad to hear this had a good ending, though! Sounds like they really took care of you. As they should. :)
 
Oh duh. I totally already knew that but didn't connect the dots. Yep, as long as both the transfer case is in 2WD and the hubs aren't locked, then the front diff doesn't move. Good call!


In my case it never leaked. I'm just pretty sure it was mentioned in the instructions that it's possible for it to leak a tiny amount during install. That's a good point that if it does leak at all the seal has inherently been compromised.

Glad to hear this had a good ending, though! Sounds like they really took care of you. As they should. :)
Oh my bad, i assumed yours leaked, if it didn’t nothing to worry about.

Yep, it was a good friday afternoon. I worked together with my installer, we first drained the diff, then went on to straighten my track bar as my passenger side was sticking out 3/4 inch more than drivers side. A couple of full turns and both sides are now equally balanced. Then we cleaned and reinstalled the diff cover, followed by the lower steering stabilizer, this time i tightened it myself - it aint falling off again😂 They rebalanced the wheels because my ridge grapplers (awful tires) started humming after 800 miles. I spray painted carli progressive deavers that started rusting less than a month on the truck and then got carried away and took care of many underbody rust spots while the truck was on the lift. Then we filled the diff fluid. It was time well spent. Going back there next week to install the sway bar and 1.5 inch block so that i have some rake with the carli kit. I cant stand my perfectly leveled truck right now. It looked so much better stock when it had the factory rake.
 
Oh my bad, i assumed yours leaked, if it didn’t nothing to worry about.

Yep, it was a good friday afternoon. I worked together with my installer, we first drained the diff, then went on to straighten my track bar as my passenger side was sticking out 3/4 inch more than drivers side. A couple of full turns and both sides are now equally balanced. Then we cleaned and reinstalled the diff cover, followed by the lower steering stabilizer, this time i tightened it myself - ot aint falling off again😂 They rebalanced the wheels because my ridge grapplers (awful tires) started humming after 800 miles. I spray painted carli progressive deavers that started rusting less than a month on the truck and then got carried away and took care of many underbody rust spots while the truck was on the lift. Then we filled the diff fluid. It was time well spent. Going back there next week to install the sway bar and 1.5 inch block so that i have some rake with the carli kit. I cant stand my perfectly leveled truck right now. It looked so much better stock when it had the factory rake.
That's a fantastic afternoon! Awesome!!

And yep, I'm with you on liking a bit of rake. Especially if there will ever be weight in/on the rear end. The worst is a nose-high truck!
 
I’m currently running the bem cap with a holder from @kmtweb. To answer your question, yes it kinda works as intended, but I’ve found that placing it “backwards” and leaning it against the inside of the fuel door is way more stable and less prone to falling off. If I remember I’ll snap a picture the next time I fill up.
It took me forever to remember, but here’s a few pictures of my cap setup. I was wrong in thinking that I put it backwards. I just have it sitting at a bit of an angle. It works just fine for me.
A32D58D5-07E8-4076-9896-5CFCE32D1F45.webp
546B3B6B-D3E3-4045-830A-F8387A13DE2E.webp
 
Got a chance to drive Shadowfax on some winter roads. Quoting myself from another thread when it comes to thoughts on the tires and slippery mode:


Two other features that stood out, though in a bad way: rain sensing wipers and lane departure warning.

The rain sensing wipers were terrible in the messy, wet spray from winter roads. Sometimes they wouldn't detect the windshield was being plastered with muddy water, causing me to have to manually trigger them. Other times they would run incessantly despite the mud on the windshield being bone dry. The mud wasn't impacting my vision in any way, so spraying washer fluid was unnecessary other than getting the wipers to stop. Changing the sensitivity won't work because those are opposing situations.

Rain sensing windshield wipers are now permanently disabled, as if I can't trust them in winter I don't want to get used to them in summer.

Lane departure warning was a mess because often in winter the tire tracks wander outside of the lane. This is a natural result of drivers guessing where the lanes are when the lines aren't visible. Then tire tracks wear down to pavement, exposing the lines, and frequently the tracks leave the lane.

Well, in those spots where the line was exposed, the lane departure warning was alerting that I was leaving the lane despite me following the tracks - despite following the tracks being the correct thing to do. This happened repeatedly.

Once again, if I can't trust it in winter I don't want to get used to it in the summer. Lane departure warning is now permanently disabled.

Lastly, I did have a warning come up in the gauge cluster stating "Front Camera Low Visibility Clean Screen". This error would show up seemingly 3 times each drive, about 5-10 mins apart. The warning consumes the gauge cluster display. It could be dismissed by hitting "OK".

This is a terribly worded warning, especially for those of us with the 360 cameras. Most people don't think of the camera behind the rear-view mirror that handles lane departure warning and automatic high beams since we don't interact with that camera directly. On the other hand, the camera in the grill is one we do interact with directly. So saying "front camera" and expecting users to understand it's the one behind the rear-view mirror is crazy.

Then they say "clean screen". What screen? I'm trying to figure out why the truck cares about the screen in the gauge cluster or center stack, which would make no sense. Then I'm thinking maybe they meant lens, which would make sense if they're talking about the camera in the grill (see previous paragraph). But then why would they be monitoring how dirty that lens is? I'll know if it needs to be cleaned when the picture quality is impacted.

In this context, "screen" refers to the windshield, which is naturally in front of the rear view mirror camera. Outside of North America, windshields are often referred to as "windscreens", so my best guess is this error message was originally written for a non-North American audience and then wound up in the Super Duty as a result of shared software. Otherwise it's bizarre since the Super Duty isn't sold by Ford outside of North America - folks need to go through import companies to get them.

The fix is simple: run washer fluid on the windshield and the wipers will wash in front of that camera, resolving the error. I didn't stumble into this fix because the dirt/mud wasn't impacting my vision, so there was no reason to use washer fluid.

This error is documented on pages 123 and 290 of the 22MY owner's manual (once for automatic high beams, once for lane departure warning):

View attachment 42161
Ha didn't know that, thats separate from the adaptive cruise warning though right, that quits a lot in heavy snow?
 
Stats from the trip I took over the holidays to see family. Involved going over a mountain pass in each direction, as well as lots of remote starts in town due to a cold snap. So 13mpg feels about right to me.

View attachment 43017
how is that showing 486 to empty, I'm showing 14.5 mpg now and still only says 425 to empty
 
Well, after the disappointment of not being able to install the Diamondback cover, I moved onto the Amp Research side steps that I purchased with the July group buy! Time flies.

Install was fairly straightforward for both sides, though I wonder if their tap was wearing out or something. Had to fight with the two bolts that attach the main bracket to the hinge portion. They were making metal shavings as they went in, but definitely weren't cross-threaded.

Also nice bonus: despite the instructions stating you need to drill a hole in the truck for a support bracket, I found there were existing holes I could use. No drilling needed! No idea when this changed, but know that for 22MY there's no drilling necessary.

Edit: Worth noting that on the passenger side the existing holes barely lined up. The slot in the bracket needs to be 1/8” longer and it would work perfectly. Had to tap the bolts through with a mallet. Didn’t require significant force, but more than I could put on it with my hand.

I'll post up some pictures another day. Didn't get any today because by the time I finished it was dark and raining. Speaking of rain, I also learned just how holy the bed is. I figured I would be out of the rain when I rolled under the truck to install the passenger step, but instead found myself being constantly dripped on from all over. 🤦‍♂️

Parts:

Edit: Pictures! Only of the passenger side, but there’s a step on the drivers side as well. It looks identical.

View attachment 41616View attachment 41617
How are you liking the steps? They ever fall down on their own Offroad?
 
And last mod for today, installed the Laminx amber lens covers for the fog lights. They’re fine for the price, but the effect is less than I was hoping for. Honestly suspect they’re balancing color with light output. Too much color and you take away too much light given the factory lights aren’t overly bright.

Install was easy, just a nuisance to get the second end in without creases since the glue starts to stick. A right angle pick helped greatly with that.

Before and after shots. The effect is definitely more noticeable in person than the pictures reflect.

View attachment 41661View attachment 41662

Parts:
And last mod for today, installed the Laminx amber lens covers for the fog lights. They’re fine for the price, but the effect is less than I was hoping for. Honestly suspect they’re balancing color with light output. Too much color and you take away too much light given the factory lights aren’t overly bright.

Install was easy, just a nuisance to get the second end in without creases since the glue starts to stick. A right angle pick helped greatly with that.

Before and after shots. The effect is definitely more noticeable in person than the pictures reflect.

View attachment 41661View attachment 41662

Parts:
Why the switch to yellow? Off topic but curious if you have any plans to add a tuner
 
How are you liking the steps? They ever fall down on their own Offroad?
Ditto. Was also wanting to add a driver and passenger side AMP step. I just need to relocate my remote fuel filter though for the driver's side since the AMP step bolts in the same location as my HSM fuel filter housing.
 

Latest Discussions

Back
Top Bottom