-
Featured
- #141
Navigation
Install the app
How to install the app on iOS
Follow along with the video below to see how to install our site as a web app on your home screen.
Note: This feature may not be available in some browsers.
More options
Style variation
You are using an out of date browser. It may not display this or other websites correctly.
You should upgrade or use an alternative browser.
You should upgrade or use an alternative browser.
On Board Air - Custom Flush Mounted Air Coupler
- OP 🔹 trofeo160
- Start date



You’re screwed now - you’re gonna find about a hundred things here you’d like to upgrade on your truck. Get that checkbook ready….I joined just now to find out how to order one of these - it's terrific.


- Jan 31, 2025
- 67
- 146
- 2024 F-350 Platinum Tremor with 6.7HO
- 2021 Toyota Land Cruiser Heritage Edition
Received mine but haven't installed yet. I took at look at it yesterday and noticed there is steel behind the area on the rear bumper that this is to be installed though it doesn't seem to be structural. Are people just hole-sawing a big hole right through the plastic bumper and the steel behind it or is my rig (2024 Platinum Tremor) somehow different? I've been accumulating parts for my system and the compressor arrived yesterday so I'm starting to sort out how it will be installed.
Yep, hole saw. Measure three times, cut once. Make sure you have your desired clearance from other parts (license plate AND frame, and the spare tire release cap) before settling in on your drilling spot. If I were doing it over, I’d give myself another 1/4”-1/2” between my location and the edge of the license plate frame.Received mine but haven't installed yet. I took at look at it yesterday and noticed there is steel behind the area on the rear bumper that this is to be installed though it doesn't seem to be structural. Are people just hole-sawing a big hole right through the plastic bumper and the steel behind it or is my rig (2024 Platinum Tremor) somehow different? I've been accumulating parts for my system and the compressor arrived yesterday so I'm starting to sort out how it will be installed.



Ain't no lie!!You’re screwed now - you’re gonna find about a hundred things here you’d like to upgrade on your truck. Get that checkbook ready….


I have two that I haven't installed yet. I'm still not 100% I need onboard air and a tank. If I do put it in, I think the sweetest setup on the 23+ trucks is to tuck one of the connectors on each side of the truck, and not in back. Tuck one on each side, up inside the built-in steps on the side of the bed. Black on black should camouflage and blend in real nice and service the front and rear tires on each side without stretching any hoses to excess, as well as anything else that presents itself.Received mine but haven't installed yet. I took at look at it yesterday and noticed there is steel behind the area on the rear bumper that this is to be installed though it doesn't seem to be structural. Are people just hole-sawing a big hole right through the plastic bumper and the steel behind it or is my rig (2024 Platinum Tremor) somehow different? ....
Please I need help contacting you, I would love to purchase one!One day my 12 year old son and I were installing On-Board air in our 22' tremor. I can't stand when stuff doesn't look oem and couldn't find anything that looked good. We decided to create our own flush mounted air coupler fitting that fits nicely into the bumper and appears as an additional 7pin housing. We posted the pics to a FB superduty forum and received several responses asking if we could make one for other people as well.
We have received substantial interest so we actually have a patent pending on it and are also working on getting a utility patent.
For the last several months my son and I we have been making these on weekends and selling them on FB tremor groups. One member suggested that I post it on here to see if you all would be interested as well.
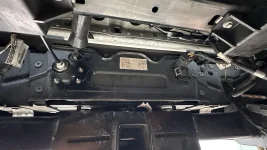
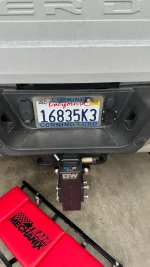
The coupler is made of all stainless steel components as we live in NY and everything else rusts. It is enclosed in a 7 pin housing so no more dirt and water getting into it rusting the coupler out. This will accept any standard 1/4" air line via the swivel push to connect mounted to the back. It clears the spare tire with no issue and will require a hole be drilled right beneath the spare tire key hole.
The cost is $125 shipped in the U.S. and $145 shipped to Canada. I require a $50 deposit upfront via venmo or zelle to cover cost of materials and the balance due when built. Send me a DM if you are interested in purchasing one. To be fully up front with turn Around time.... it is approx 3 weeks as we have to work around sports and camping trips and before you ask I do not have a website as this is just a small father son project that pays for new toys for the tremor and video games for the 12 year old...lol. I promise I'm not the IRS asking for target gift cards or selling solar trying to steal peoples money, LOLOL.
Pictures attached of one of our batches and a short video on how the quick connect releases.
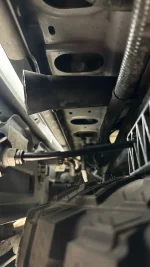
I have also attached pictures of the rest of my onboard air install if anyone else is interested. It’s a twin ARB air compressor and 3 gallon aluminum vixen air tank. The air compressor is mounted above the spare tire plate and air tank is mounted in front of the spare tire mounting plate.
View attachment 122073View attachment 122075View attachment 122074
View attachment 122079View attachment 122080View attachment 122078View attachment 122077View attachment 122076

So your using fuel line for your airlines?I prefer braided Teflon for my air lines just because they are abrasion and heat resistant. This is the kind I used for my whole air system. It's a little pricy but extremely durable, handles higher pressure even when hot and has both stainless and nylon jacket. Plus you can make them up to your length very easily. They have a wide variety of fitting shapes for every need. Here's the initial kit I ordered. https://www.amazon.com/dp/B0922M63H8?ref_=ppx_hzsearch_conn_dt_b_fed_asin_title_11&th=1
View attachment 214937


Yep, call it what you will, it's high temperature teflon reinforced with stainless and nylon braid. The first 3-5 feet of line attaching to the compressor gets extremely hot when running for longer periods like when re-inflating all four tires. Regular nylon air line will often fail in the first few feet because of that. I'm known for over engineering things, but rarely experience failures because of that tendency.So your using fuel line for your airlines?
Edit: BTW the Airlift 5000 Ultimate Plus system I installed comes supplied with stainless braided Teflon air lines rather than the usual black nylon airlines. All threaded connections and no worries about close proximity to the exhaust system.
Last edited:
Ok, just checking. Thanks. I’m order some today!Yep, call it what you will, it's high temperature teflon reinforced with stainless and nylon braid. The first 3-5 feet of line attaching to the compressor gets extremely hot when running for longer periods like when re-inflating all four tires. Regular nylon air line will often fail in the first few feet because of that. I'm known for over engineering things, but rarely experience failures because of that tendency.
Edit: BTW the Airlift 5000 Ultimate Plus system I installed comes supplied with stainless braided Teflon air lines rather than the usual black nylon airlines. All threaded connections and no worries about close proximity to the exhaust system.
Buy extra, it can be a little challenging to work with.Ok, just checking. Thanks. I’m order some today!
- Jan 31, 2025
- 67
- 146
- 2024 F-350 Platinum Tremor with 6.7HO
- 2021 Toyota Land Cruiser Heritage Edition
Finally going to get started installing my air system this week/weekend. My WA license plate seems to be slightly wider than others so it's a very tight fit between it and the outside of the bumper, pretty nervous about blasting a huge hole through it. I made a template so i can get the hole perfect, fingers crossed. I landed on putting the compressor behind the rear seat using a Dirt Church Industries mount with a Viair tank behind the spare tire. Planned to put the compressor above the spare tire but in the PNW I'm concerned with the 8 months of rain a year. With a long high temperature teflon lined stainless braided line from the compressor to the tank I imagine the air will be cool enough to not melt the nylon DOT lines i'm using from the tank to the outlet.

Well, I finally got around to installing my on board air system on my 2022 (after over 2 years) and this coupler is nothing short of amazing. I am repeating what has been said here before, great quality, great product and great communication! I mirrored much of Trefeo's build,
Attached is my build It consists of the following:
ARB CKMTA Compressor.
Vixen 3 gallon tank link
40" Stainless steel reinforced hose (compressor to tank) link
90 degree adapter fitting for compressor to tank link
1/4" DOT air line hose link
3/8 plug for one end (air horn to be added here later) link
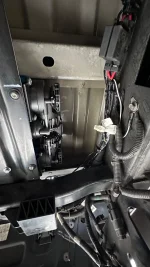
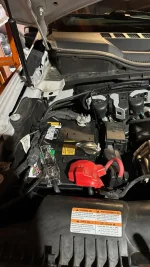
Combined the 2 40 watt lines on the compressor and run a 4 gauge power line with a 100 amp fuse and ran this directly to the battery (that is what is on the battery). link
Tank fittings/plugs link
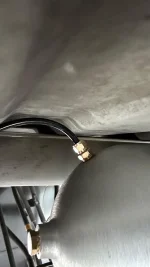
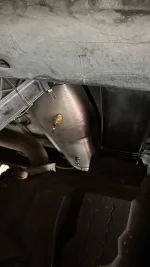
10" brackets bought at home depot that I cut down and used a drill press to mount the feet of the compressor to. I then bolted the bracket to the spare tire attachment plate. There are grooves on the tire mounting plate that these brackets slide into perfectly. Thanks again Trofeo for finding & sharing these! YOu can see that they were cut down and you also need to first insert the brackets, then add the feet and straps for the tank. I will include some pictures of what I did as it is it was time consuming. link
The spare tire mounts easily with no issues. Thanks again to Trefeo and all of the members on this forum who make it great.
Attached is my build It consists of the following:
ARB CKMTA Compressor.
Vixen 3 gallon tank link
40" Stainless steel reinforced hose (compressor to tank) link
90 degree adapter fitting for compressor to tank link
1/4" DOT air line hose link
3/8 plug for one end (air horn to be added here later) link
Combined the 2 40 watt lines on the compressor and run a 4 gauge power line with a 100 amp fuse and ran this directly to the battery (that is what is on the battery). link
Tank fittings/plugs link
10" brackets bought at home depot that I cut down and used a drill press to mount the feet of the compressor to. I then bolted the bracket to the spare tire attachment plate. There are grooves on the tire mounting plate that these brackets slide into perfectly. Thanks again Trofeo for finding & sharing these! YOu can see that they were cut down and you also need to first insert the brackets, then add the feet and straps for the tank. I will include some pictures of what I did as it is it was time consuming. link
The spare tire mounts easily with no issues. Thanks again to Trefeo and all of the members on this forum who make it great.
Attachments
-
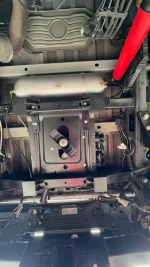 OBA Full Image.webp165 KB · Views: 56
 -
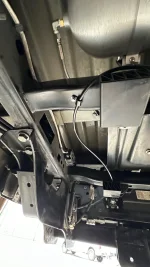 Airline in.webp107.9 KB · Views: 55
 -
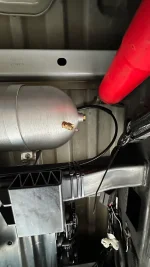 Airline out 1.webp99.3 KB · Views: 57
 -
 Airline out 2.webp67.9 KB · Views: 57
 -
 ARB Wiring.webp131.7 KB · Views: 54
 -
 Battery Terminal.webp176.4 KB · Views: 59
 -
 Coupler back.webp120.9 KB · Views: 63
 -
 Coupler front.webp183.5 KB · Views: 66
 -
 Air line to coupler with tire.webp76.6 KB · Views: 63
 -
 ARB mounted.webp28.9 KB · Views: 51
 -
 tank drain access.webp89.1 KB · Views: 57
- Staff 🛡️
- #157

- Jun 25, 2021
- 10,974
- 20,621
- 22MY F250 Star White Lariat Tremor
- 22MY Winnebago Voyage 2831RB
Nice Summary!Well, I finally got around to installing my on board air system on my 2022 (after over 2 years) and this coupler is nothing short of amazing. I am repeating what has been said here before, great quality, great product and great communication! I mirrored much of Trefeo's build,
Attached is my build It consists of the following:
ARB CKMTA Compressor.
Vixen 3 gallon tank link
40" Stainless steel reinforced hose (compressor to tank) link
90 degree adapter fitting for compressor to tank link
1/4" DOT air line hose link
3/8 plug for one end (air horn to be added here later) link
Combined the 2 40 watt lines on the compressor and run a 4 gauge power line with a 100 amp fuse and ran this directly to the battery (that is what is on the battery). link
Tank fittings/plugs link
10" brackets bought at home depot that I cut down and used a drill press to mount the feet of the compressor to. I then bolted the bracket to the spare tire attachment plate. There are grooves on the tire mounting plate that these brackets slide into perfectly. Thanks again Trofeo for finding & sharing these! YOu can see that they were cut down and you also need to first insert the brackets, then add the feet and straps for the tank. I will include some pictures of what I did as it is it was time consuming. link
The spare tire mounts easily with no issues. Thanks again to Trefeo and all of the members on this forum who make it great.
- Jan 31, 2025
- 67
- 146
- 2024 F-350 Platinum Tremor with 6.7HO
- 2021 Toyota Land Cruiser Heritage Edition
Install went well, absolutely nailed the hole in the bumper! I made a small template from cereal box cardboard (the best for making templates) so I could be 100% confident in where I blasted the hole through the bumper. The 12’ stainless braided hose worked great and I put a check valve on the tank that seems to help keep the air IN the tank. I used Loctite 545 instead of Teflon tape and the tank has held pressure for days so far. The tank and inlet fittings are ice cold after filling. I was expecting the compressor to be really loud but it’s not bad at all. Overall very happy with the air inlet, great product!Finally going to get started installing my air system this week/weekend. My WA license plate seems to be slightly wider than others so it's a very tight fit between it and the outside of the bumper, pretty nervous about blasting a huge hole through it. I made a template so i can get the hole perfect, fingers crossed. I landed on putting the compressor behind the rear seat using a Dirt Church Industries mount with a Viair tank behind the spare tire. Planned to put the compressor above the spare tire but in the PNW I'm concerned with the 8 months of rain a year. With a long high temperature teflon lined stainless braided line from the compressor to the tank I imagine the air will be cool enough to not melt the nylon DOT lines i'm using from the tank to the outlet.
Will reach out
I joined just now to find out how to order one of these. This is the best thing since sliced bread!!!!!



![What did you do to your Tremor today? [2019-2024]](https://www.fordtremor.com/data/files/featured_images/featuredimages_thumb_5.webp?1792071336)