Wolfbox G900TriPro Bumper Cam Install (Complete)

Phil314

Tremoraholic
Joined
Apr 16, 2022
Messages
677
Reaction Points
1,763
Location
45.2521, -93.5612
Current Rides #1
2020 F350 Tremor 7.3 Lariet BAP
Current Rides #2
94 CBR600F2 @ 232K
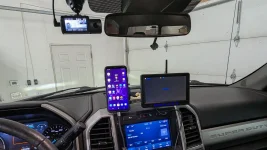
I had 3 reasons for installing this. 1) I dislike my current dash cam. 2) I need to see behind my camper. 3) My dash is getting cluttered.
The G900 with replace the dashcam, rear view monitor and rear view mirror.
And the G900 will provide a rear view even when loaded with a truck camper. Intuitive and kind of cool.
PXL_20251025_200450307.webp

First thing about the install. Plan ahead. This is a wired system. Lots of wires.
You'll have to pull apart a lot of the trim to route wires. Don't think you'll get this all done in 1 day.
Most of them have 90 degree connectors so they are tricky to fish through places.
I had to remove my old dashcam, so when I pull the old wires, I tied string to them.
This way I could use the string to pull the new wires through.
This kind of worked, but not as well as I'd hoped. I still ended up taking a lot of trim off.
PXL_20251027_225435629.webp

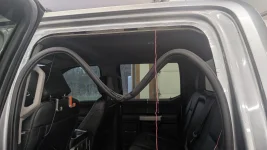
Mounting the G900 is easy. #1 bracket directly replaces the stock rearview mirror.
Next I had to get power to the G900. This turned out to be a pain for no reason.
My old power converter mounted down by the fusebox.
The power wire running up behind the dash, up the A piller and across the top of the windsheild.
However the G900 didn't have enough length to do the same.
And when I pulled it, it went up behind the dash and got stuck.
2 freakin hrs trying to get it back out.
If you've ever had to futz with the passenger side fusebox, you know what a mess it is in there.
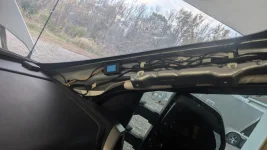
Finally got it out and mounted it in the A piller.
Not the way I wanted to do it, but I guess it works and it's much easy to get to.
Mounted the GPS receiver next to it on the dash.
PXL_20251027_225524587.webp

Then ran the wire to the rear view camera. That was fairly easy.
It's a long wire and there is a ton of extra. I considered cutting it shorter.
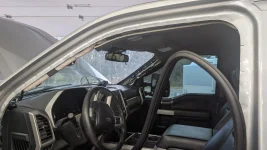
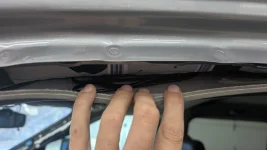
But in the end, I just tucked it up behind the side air bags.
Make sure you get it behind the airbags.
Would suck if they went off and took the wires and G900 with it.
PXL_20251027_225448078.webpPXL_20251027_201917856.webp

Now if you're still with me. Here comes the cool part.
Mounting the rear view camera inside sucks. My old dashcam had a great rear camera.
With the G900, there's no easy way to mount it. So it's 3D print time.
I designed and printed my own rear view mount. (Ok, I did get some design hints from another mount.)
Here's a few test iterations trying to work out the dimensions & the final mount.
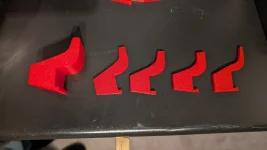
PXL_20251028_231017095.webp

It simple slips up behind the headliner and the camera mounts with 2 screws.
2 minutes max to mount, easy to remove. And the image is perfect.
Can see in the bed, behind and beyond. Will print a final one in flat black later.
I may end up making a couple other variations for alternate mountings.
And as always, anything I design will be free for anyone to download & use.
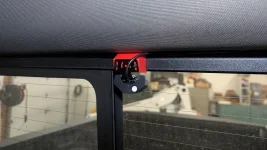
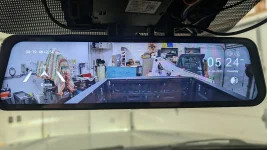
PXL_20251028_222251250.webpPXL_20251028_222404509.webp
 
I had 3 reasons for installing this. 1) I dislike my current dash cam. 2) I need to see behind my camper. 3) My dash is getting cluttered.
The G900 with replace the dashcam, rear view monitor and rear view mirror.
And the G900 will provide a rear view even when loaded with a truck camper. Intuitive and kind of cool.

View attachment 232077

First thing about the install. Plan ahead. This is a wired system. Lots of wires.
You'll have to pull apart a lot of the trim to route wires. Don't think you'll get this all done in 1 day.
Most of them have 90 degree connectors so they are tricky to fish through places.
I had to remove my old dashcam, so when I pull the old wires, I tied string to them.
This way I could use the string to pull the new wires through.
This kind of worked, but not as well as I'd hoped. I still ended up taking a lot of trim off.

View attachment 232082

Mounting the G900 is easy. #1 bracket directly replaces the stock rearview mirror.
Next I had to get power to the G900. This turned out to be a pain for no reason.
My old power converter mounted down by the fusebox.
The power wire running up behind the dash, up the A piller and across the top of the windsheild.
However the G900 didn't have enough length to do the same.
And when I pulled it, it went up behind the dash and got stuck.
2 freakin hrs trying to get it back out.
If you've ever had to futz with the passenger side fusebox, you know what a mess it is in there.
Finally got it out and mounted it in the A piller.
Not the way I wanted to do it, but I guess it works and it's much easy to get to.
Mounted the GPS receiver next to it on the dash.

View attachment 232084

Then ran the wire to the rear view camera. That was fairly easy.
It's a long wire and there is a ton of extra. I considered cutting it shorter.
But in the end, I just tucked it up behind the side air bags.
Make sure you get it behind the airbags.
Would suck if they went off and took the wires and G900 with it.

View attachment 232083View attachment 232081

Now if you're still with me. Here comes the cool part.
Mounting the rear view camera inside sucks. My old dashcam had a great rear camera.
With the G900, there's no easy way to mount it. So it's 3D print time.
I designed and printed my own rear view mount. (Ok, I did get some design hints from another mount.)
Here's a few test iterations trying to work out the dimensions & the final mount.

View attachment 232091

It simple slips up behind the headliner and the camera mounts with 2 screws.
2 minutes max to mount, easy to remove. And the image is perfect.
Can see in the bed, behind and beyond. Will print a final one in flat black later.
I may end up making a couple other variations for alternate mountings.
And as always, anything I design will be free for anyone to download & use.

View attachment 232085View attachment 232086
Nicely done! I think that cam was my least favorite part of the install as well. I had mine on the outside, under the third brake light for the first couple months. But once it started getting colder, it would fog up and be useless in the mornings. Last weekend I pulled it back into the cab and mounted on the same rail that you did, but dead center of the rear window. There's about a millimeter of clearance between the front of the camera and the glass. I'm happy with that.
 
Nicely done! I think that cam was my least favorite part of the install as well. I had mine on the outside, under the third brake light for the first couple months. But once it started getting colder, it would fog up and be useless in the mornings. Last weekend I pulled it back into the cab and mounted on the same rail that you did, but dead center of the rear window. There's about a millimeter of clearance between the front of the camera and the glass. I'm happy with that.
I'd really like to see how you mounted yours. If you could post a pic please.
I mounted mine off to the side because the sliding window has such a big black border and I didn't want the heating lines in front of the camera. There just isn't a lot of space between those 2.
 
Looks slick. Seriously considering this versus a more traditional cam.

What does one actually loose functionally if you remove your powered mirror for this? Just autodimming of the rear view?
 
Excellent install and yes that power connection is a PITA -
Found that the SD card is easy to remove if you use a small bladed screw drive to push down on the card which releases it.
Wolfbox has a nifty player that installs on your desktop https://wolfbox.com/pages/wolfbox-player there are versions for Windows and Mac
Link to Wolfbox mobile app https://wolfbox.com/pages/app seems like Android only
 
Looks slick. Seriously considering this versus a more traditional cam.

What does one actually loose functionally if you remove your powered mirror for this? Just auto dimming of the rear view?
On my 24MY, the only thing lost on my install was auto dimming, connecting that to FitDVR, https://fitdvr.com/collections/ford providing power to Wolfbox, pulled down head liner to hide the connection and FitDVR box, saving me having to run power down A pillar.
With the Smart Cap installed, opted to install rear camera on the rear license plate using Wolfbox license plate bracket.
Fishing the camera connection to Wolfbox is a PITA, requiring patience and adult beverages, yet it gives me a great view to the rear, like being able to record from both front and rear cameras.
@Optimus🤖 know you'll have a comment about the rear end
 
On my 24MY, the only thing lost on my install was auto dimming, connecting that to FitDVR, https://fitdvr.com/collections/ford providing power to Wolfbox, pulled down head liner to hide the connection and FitDVR box, saving me having to run power down A pillar.
With the Smart Cap installed, opted to install rear camera on the rear license plate using Wolfbox license plate bracket.
Fishing the camera connection to Wolfbox is a PITA, requiring patience and adult beverages, yet it gives me a great view to the rear, like being able to record from both front and rear cameras.
@Optimus🤖 know you'll have a comment about the rear end
Can confirm that the only thing you lose is the auto dimming on the mirror. Everything else works fine.

I looked at the FitDVR too. But either way, you still have to hide a brick.
So I decided to just go with the one included instead of buying another piece.
My biggest problem was getting the dam thing stuck behind the dash.:mad:
If I'd gone from the top to begin with, it would have been fine.
But that's part of the learning process and the purpose of this post.
So others can benefit from my pain and suffering. :ROFLMAO:
 
I just got mine in the mail today. I was hoping your instructions were going to paint an easier picture, but thanks for the help and description of the pain points.

-
 
I'd really like to see how you mounted yours. If you could post a pic please.
I mounted mine off to the side because the sliding window has such a big black border and I didn't want the heating lines in front of the camera. There just isn't a lot of space between those 2.
Here you go! It looks like one of the heating lines would be in my way, but I can’t see it on camera.
IMG_8356.webp
IMG_8358.webp
 
Last edited:
Finished up installing the final part today - the front bumper cam.

First thing was to get the cable out to the front of the truck.
Generally when installing things, I try to do everything so it can be undone later.
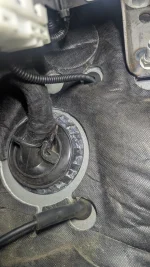
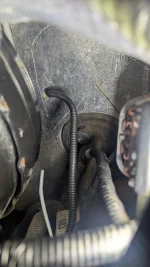
However, I couldn't find a good way to run a cable through the firewall.
There seems to be a perfect spot just for that, just above the main harness.
So I did end up drilling a 1/2 hole and installing a rubber grommet.
It's ~2mm thick aluminum, a step bit works a lot better than a regular drill bit.
It comes out just behind the brake booster, so it's a fairly protected spot.

PXL_20251030_181901535.webpPXL_20251030_180153243.webp

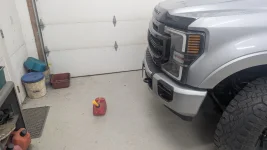
Next was mounting the camera itself. I've got a receiver mounted winch on front.
So I need to mount the camera high up and aimed down.
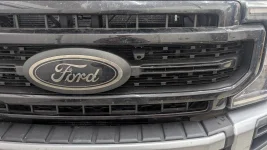
The ford emblem is kind of in the way. And the grill is curved so the top row didn't work.
I eventually decided to mount it to the driver side of the emblem.
I should be able to see over the winch and the camera only catches part of the emblem.
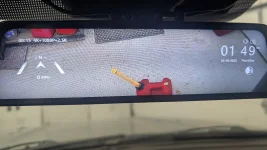
I can see objects 2ft in front all the way out to 50ft or more. Totally awesome.

PXL_20251029_220342848.webpPXL_20251030_184936865.webpPXL_20251030_184916078.webp

It's already proved very useful when parking. I can actually see how close I am to things.
It will also be great for rock crawling or trail riding.
And hopefully no more center punching stuff with my winch. 😱

Rear window mounts for anyone who wants them:
 
Last edited:
Have you been able to keeps yours on after you turn off the truck? Mine looks like it wants to stay on but then just turns off. I'm wondering if I switched the ACC and +12 wires.
 
Have you been able to keeps yours on after you turn off the truck? Mine looks like it wants to stay on but then just turns off. I'm wondering if I switched the ACC and +12 wires.

The red wire (acc) is pluged into fuse #35 in the passenger side fuse box.
This is a true accessory connection. This was where my old dash cam was connected.
I didn't use park mode with it, so it had both yellow & red wired to here.
Dashcam was on only when the truck is on.

This time, I wired the yellow wire (B+) to fuse #29 (adjustable pedals).
When I measured this fuse it was 12v with the truck off.
However, I'm not convinced right now that this is 'always on'.
This truck likes to make things look live - like power outlets.
But the turns them off after a set amount of time.

Update: After some investigating, it seems fuses #29, #31, #32 all have constant power.
Left the passenger door open for 1/2 hour and then check. All still had power.
 
Last edited:
Has anyone figured how to hook this up to an always on upfitter so it can selectively be left in park mode with a flip of a switch?
 
Had mine installed yesterday. Great mod for my ‘21.
Also picked this up for the rear window mount if anyone hasn’t seen it yet. Ended up mounting rear license plate so didn’t use it.
IMG_5516.webp
 
FYI for anyone with a G900TriPro.
They release firmware V1.6 a couple weeks ago.
Includes a zoom in feature, kind of cool.
But more important, now supports voice command for the bumper camera!!.
 
FYI for anyone with a G900TriPro.
They release firmware V1.6 a couple weeks ago.
Includes a zoom in feature, kind of cool.
But more important, now supports voice command for the bumper camera!!.
I usually jump on updates for everything as soon as I know about them, but this is a weird statement from Wolfbox. Are we actually supposed to wait until the thing starts malfunctioning to update the firmware?
1764656489702.webp
 
I usually jump on updates for everything as soon as I know about them, but this is a weird statement from Wolfbox. Are we actually supposed to wait until the thing starts malfunctioning to update the firmware?
That is just a general CYA msg from Wolfbox.
Apparently there have been a lot of people updating their firmware with firmware file for the wrong model wolfbox.
That's the reason for the 'don't do it unless you really need to' msg.
I am having some problems with mine, so I was hoping the update would maybe fix it.

But also, it seems Wolfbox has pulled the V1.6 G900TriPro update off their website.
No totally ready for release and still trying to work out some bugs.
So we have to wait a bit.
 
That is just a general CYA msg from Wolfbox.
Apparently there have been a lot of people updating their firmware with firmware file for the wrong model wolfbox.
That's the reason for the 'don't do it unless you really need to' msg.
I am having some problems with mine, so I was hoping the update would maybe fix it.

But also, it seems Wolfbox has pulled the V1.6 G900TriPro update off their website.
No totally ready for release and still trying to work out some bugs.
So we have to wait a bit.
Gotcha, makes sense. Like all those stupid stickers I take off of everything that say "Don't do this"... The only issue I've had with mine is that it takes a while to boot at startup. At least slower than the G850 I had. I was kinda hoping an update would help with that. It sucks that they pulled the update. Maybe for the best though. I don't want bugs.
 
Update - That firmware version will indeed cause issues at this point! I was chatting with Wolfbox on their site yesterday about the long boot-up time, and asked when the new firmware version would be released. They mentioned something to the effect of temporarily removing it due to improper update issues, as mentioned above, but said that they'd send it to me if I wanted it. I felt ballsy, so I gave it a shot... They emailed the link to download the file. I followed all directions, formatted the SD card, installed the new file in the root folder, and installed it on the mirror. It got about 50% through the installation before the screen went black, similar to when a PC updates faster than it says it will. I waited a while longer, but nothing happened. I did all the typical power cycling troubleshooting to no avail. Checked fuses, nothing blown. I emailed them back, and they asked for my current firmware version and serial number. Had me try another power source (cigarette lighter power/USB-C charger) and do a hard reset. Nothing! Ended up with a bricked dashcam mirror.

Shortly after I replied that it still wasn't powering up, they asked for my address to send me a new one ASAP, without me even asking! They also said they'd wait to hear back from me on whether the new one was working as expected before issuing a return label for the faulty one. Pretty good customer service if you ask me.
 
Back
Top Bottom