Flourman’s Grand Design Momentum 21g Build

Flourman

Tremor Fiend
Joined
Aug 19, 2021
Messages
287
Reaction Points
943
Location
Colorado
Current Ride
2022 F350 Lariat Tremor
Current Ride #2
2019 Beta 300RR
The whole reason I got a Tremor was to pull my Grand Design Momentum 21g. My F150 with the 3.5EB motor pulled it great but we are usually camping 2-3 weekends a month during the summer so putting a lot of miles, towing through the Rockies and running the motor towards the top end. Great motor and I loved every aspect of it except heat generation under heavy boost and low RPM’s

The Momentum series all have a 100 gallon fresh water and big black and gray water storage with a GVW of 10,000lbs. This was pushing the tongue weight of what the F150 liked and especially with a full load of fresh plus bikes AND starting most towing trips at 5300 feet elevation and going up, the F150 was on the edge. It did it, but it made towing pretty stressful, watching water temps, manually changing gears to manage the water temps (running 3200-3800 RPM was the sweet spot when towing grades) and then braking/sway/wind with the lighter truck. It took a lot of out me on a long towing day.

C9849FD2-C0C5-4967-9AD7-C3C095A3CFB3.jpeg


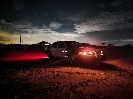
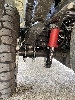
Anyway, we started looking for a larger camper after our annual spring break trip last year. Obligatory picture of old camper and said F150
85AA6EDA-4A2C-4A23-8E74-D4FA185B3E38.jpeg
 
Last edited:
With our older camper, I had installed 200w of solar on the roof, 200w of mobile solar, 200Ah of batter on 6-volt batteries, 700W inverter and a cell phone booster. We love to boondock so all of this was necessary.

When looking, new units were super hard to get so we go a 2019 model with hardly any use. Momentum’s come optioned in with a 4kW generator and a 30 gallon fuel tank. This was one of the draws for getting a 7.3 Tremor. At the end of trips, I’ll draw the generator down to about 1/4-tank and put that in the truck to get towing weight down on the trailer.

Even with a generator, we didn’t want to have to use the generator all of the time so on I went to adding solar.

The first step was a 270Ah lithium pack I built myself. I like to repurpose stuff, so I repurposed an old wood crate for my battery box.

I’m using 4, 270Ah Lishon cells and fed through an Overkill Solar Battery Management system. It has a nice Bluetooth app to monitor and also control the system. What’s super nice is that is has an automatic shutoff for charging when temps get below freezing. In case you don’t know, it damages lithium batteries to charge below freezing. I’m also able to monitor charge level, charging amperage/watts and discharge amperage and watts. It limits current draw and automatically shuts off at low level and high level for each individual cell.

I’m running the solar and normal 12VDC charging through a Renogy MPPT/DC-DC unit. It’s a 30A unit.

I’m also running a Victron shunt. It kind of doubles up on what the BMS does as far as monitoring but I can also monitor my generator starting battery voltage with it. It’s also very good at keeping track of cumulative power useage.

I set up my circuit to let the camper converter (thing that charges the batteries and usually runs the 12v items in the camper) to charge the lead acid battery on the tongue first. I kept the single lead acid on the tongue to start the generator with as the generator starting load is at the upper edge of what the BMS can handle.

The Renogy controller will start to charge the lithium on the DC-DC circuit when the voltage is above 13.2 (really around 13.25.13.27) so I did have to bump my converter float voltage up a bit to keep a good float charge on the lithium’s. This is due to voltage drop across the wires. The charger does this as it doesn’t want to drain the starting batteries to keep the house batteries charged. This unit can be used for camper vans/trucks as well. I can trick the converter into full boost mode by putting a load testing on the lead acid battery and dropping it to about 12.1V. This kicks in about 50A of total charging, under normal float, it maxes out at 7A.

It will also run a normal MPPT solar charge. The main downside to this unit is when charging off both DC and solar, it limits either side to 15A. I likely should have got the 50A unit from Renogy but this will do for now.
61274D97-ABED-4644-80D7-C69F0C3AD041.jpeg

Onto the solar I knew I needed more 400W on this camper as it’s larger and we are running more stuff off the 12V system. Also, with the mounted solar on the roof, different things like tree cover, clouds, etc can impact total Watts brought in. 12VDC power is one of my major anxiety points when boondocking, specifically in early/late season where we need it to run the heater.

As it was already summer, I opted for the easiest install first, which was mobile solar. I had used flexible 100W panels with my previous build and knew I didn’t want to do the same, so I opted for the 200W Renogy suitcase set-up. This was a wise decision as they are robust and much better quality.

I bought a heavy duty extension cord, cut the ends off and attached MC-4 (solar connectors) to one end to make a cord long enough to be able to move the panels around where I need them (in the sun). The 200W along with the MPPT make a great combination for now. I had a PWM controller on the old camper and it’s amazing how much more efficient the MPPT controller is.
C1E38A99-4809-4898-9815-C17A9802DB63.jpeg

I had used a standard SAE 12V connector to connect my mobile solar cord to the camper (and solar controller) previously. After some use, the weight of the cord combined combined with the SAE plug made it difficult to get a good connection as the pins had started to widen. I looked around for a simple, waterproof connection and had settled on some sort of trailer plug. I also knew I wanted to bring my solar power in but also have a 12VDC power out as we run an ARB fridge outside (usually beer, veggies etc) for extra cooled storage.

I found a super cool, magnetic 7-pin RV plug on E-trailer and used it. It’s a pigtail and I connect my solar “extension cord” to it as well as our fridge.
F477CC64-05E7-4677-A322-7BE5321A9CC8.jpeg

82C1A403-2ABA-4CA9-9A5B-B59C337145FD.jpeg

5A0AAE0D-995F-49DD-A373-926102A5DA31.jpeg
 
Since we bought the toy hauler to put bikes in, I had to figure out how best to get bikes in the toy hauler, securely. The last thing I wanted was a bike flying around and going through a cupboard in the trailer. Toy Haulers are set-up with D-rings in the floor, great for SXS’s but not so great for bikes.

There were a few options out there for a ready built setup, but, after we bought it, we had a trip that following weekend to the Utah desert that I had to figure out how to get the bikes loaded. With some Google-Fu, I was able to find someone that did a home-brew setup.

I used the “sign post” material from Home Depot, some rated J-bolts, rated clips and some chain to make a quick hold bike rack in the camper. I didn’t want something sitting on the floor when the bikes weren’t in the camper so I opted for this. I take it out when we are using the camper. It’s about a 10 minute process to put it back in and load bikes. I have since added a wheel chock in the middle as an easier way to haul three bikes and not have to add in my second row of “sign post”.

I’ve got close to 2000 miles hauling with this setup with fantastic results. The first time I used it, we were towing back to Denver on I-70 and the highway is TERRIBLE through Vail. I did hit a pot hole and broke a foot peg on a bike. The bike stayed put. It was an older foot peg that’s been abused and such. Since that trip, I haven’t had a single issue.

222C0172-6055-42EF-ACA2-7D882A27D128.jpeg

9011D16C-3936-4B44-8049-24DA58CC0AB5.jpeg
 
I took the cell booster out of our old camper to put in this one. I travel for work so when COVID hit, traveling more or less stopped but definitely going to the office stopped. I’m fortunate enough, I could work from home so I decided that home was anywhere with good cell service. Since then, I’ve gotten back to traveling 4 days a week, about every week but my company also moved my position to full time remote so I don’t ever HAVE to go to an official office.

I’m using a Weboost Drive RV. It’s not the most powerful booster but it’s the most powerful you can get and still have it on while driving. The larger booster has a much larger, direction antenna.

I don’t have any pictures of it but it’s a pretty simple set-up. I mounted the antenna on the rear of the camper and the booster in the under sink cabinet. The interior antenna is mounted on the lower side of the cabinets above the sink and allows me to put my hotspot right next to it.

A few things about cell phone boosters, they only work when there is signal to boost. They do help with download speeds but mostly help with upload speeds. They also help the latency which is a big deal for online meetings. Also, the boosted signal fades pretty quick as you get further from the interior antenna. Hence the reason for mounting the interior antenna somewhere that I could set my hotspot close to it.

I use a Verizon jet pack hotspot with a 30GB data plan. The jet pack also has provisions for an exterior antenna so I bring along a MiMo antenna. I’ll test the cellphone booster vs. the MiMo antenna and see which one gives better results. I’ve since upgrade my cell plan to allow my phone to be a hotspot too so I can compare ATT vs. Verizon in several areas. Verizon coverage seems to be the best in the CO mountains.
 
Last edited:
And then lastly, is my inverter set-up. Our Momentum didn’t come with an inverter like some do so I added my own. I’m using a Samlex 1500W inverter. We only wanted the inverter to run the TV and a few other things (like 110V charging for radios and other devices). Samlex was one of the few that had both an outlet on the unit and the provision to hardwire in for 110V power. It is a true Sine Wave inverter as well.

There is a funny cubby on top of the single outside storage on Momentum’s and was perfect for mounting the inverter. And even more funny, I can stand up inside the storage cubby. It got quite warm in there when I was installing it (90+ degree day).

I ran the hardwired section back to the main power distribution panel inside the camper and tied into the standard 110V outlet circuit in the camper. In interest of simplicity, I decided not to tie into the GFCI outlets at this time.

The inverter came with a remote panel and I also installed a manual transfer switch to only power the 110V GFCI outlets. I did it this way as I didn’t get an inverter big enough to run EVERYTHING in the camper as we didn’t need it. Also, I didn’t want the camper converter trying to charge the batteries it was pulling DC from and making a loop. I could have just turned off the breakers for the air conditioner as well as the converter charger but I also had to consider simplicity as my wife would be the one doing it (most of the time). It’s easier to have one big switch and say which outlets have power than saying “turn off this switch and this switch, then turn on this switch then when you are done, do the opposite”.
4FCCCE6C-1C60-4CDD-ADEB-01B4146B98FF.jpeg

D2A8D529-C2AC-4346-8C65-4F71EB97FCBE.jpeg
 
@Flourman excellent write up and explanation! Little different topic but have you thought about 4 stroke at all? Just curious, alot depends on the type of terrain you ride...
 
Nice write up. I’m going to try and incorporate some of this into my trailer. However you have skills I don’t do I may ask questions about it all.
 
@Flourman excellent write up and explanation! Little different topic but have you thought about 4 stroke at all? Just curious, alot depends on the type of terrain you ride...
I’ve had a couple 4-strokes but the bee knees for 90% of what we do in Colorado and Utah are 300 2-strokes. They have the weight down low, are super torquey for a 2-stroke, resist flame out and are a bit lighter overall and that’s right out of the box. The 350 4-strokes are about the closest one can get to a 300 2-stroke but even there, they run hot and need a auto clutch or a lot of clutch skill.

The 300’s can about rev to zero and still come back from it. 4-strokes will flame out and make for a rough day on the trails.
 
Nice write up. I’m going to try and incorporate some of this into my trailer. However you have skills I don’t do I may ask questions about it all.
Thanks and fire away!! I didn’t know anything until I started messing around. This is our third camper with a solar set-up and I’ve kept trying to learn and improve each time.
 
300 2-strokes
Thanks. I've had both and liked both styles for different reasons. The Honda CRFX I had was a blast, until it got in its moods where it didn't want to restart. That wasn't fun. My buddy had a KTM 300 2 stroke that felt like a superbike on the trails. Thing was a beast - in a good way!
 
Love the setup. 2stroke 300 might be a good call for me. Sold my F800gs as road riding was just getting sketchy. Want something all dirt for the days I feel like exploring more and pedaling less. Light, tall, and torque is what I want.

I'll be hitting you up for more on the shore power stuff as well.
 
With our older camper, I had installed 200w of solar on the roof, 200w of mobile solar, 200Ah of batter on 6-volt batteries, 700W inverter and a cell phone booster. We love to boondock so all of this was necessary.

When looking, new units were super hard to get so we go a 2019 model with hardly any use. Momentum’s come optioned in with a 4kW generator and a 30 gallon fuel tank. This was one of the draws for getting a 7.3 Tremor. At the end of trips, I’ll draw the generator down to about 1/4-tank and put that in the truck to get towing weight down on the trailer.

Even with a generator, we didn’t want to have to use the generator all of the time so on I went to adding solar.

The first step was a 270Ah lithium pack I built myself. I like to repurpose stuff, so I repurposed an old wood crate for my battery box.

I’m using 4, 270Ah Lishon cells and fed through an Overkill Solar Battery Management system. It has a nice Bluetooth app to monitor and also control the system. What’s super nice is that is has an automatic shutoff for charging when temps get below freezing. In case you don’t know, it damages lithium batteries to charge below freezing. I’m also able to monitor charge level, charging amperage/watts and discharge amperage and watts. It limits current draw and automatically shuts off at low level and high level for each individual cell.

I’m running the solar and normal 12VDC charging through a Renogy MPPT/DC-DC unit. It’s a 30A unit.

I’m also running a Victron shunt. It kind of doubles up on what the BMS does as far as monitoring but I can also monitor my generator starting battery voltage with it. It’s also very good at keeping track of cumulative power useage.

I set up my circuit to let the camper converter (thing that charges the batteries and usually runs the 12v items in the camper) to charge the lead acid battery on the tongue first. I kept the single lead acid on the tongue to start the generator with as the generator starting load is at the upper edge of what the BMS can handle.

The Renogy controller will start to charge the lithium on the DC-DC circuit when the voltage is above 13.2 (really around 13.25.13.27) so I did have to bump my converter float voltage up a bit to keep a good float charge on the lithium’s. This is due to voltage drop across the wires. The charger does this as it doesn’t want to drain the starting batteries to keep the house batteries charged. This unit can be used for camper vans/trucks as well. I can trick the converter into full boost mode by putting a load testing on the lead acid battery and dropping it to about 12.1V. This kicks in about 50A of total charging, under normal float, it maxes out at 7A.

It will also run a normal MPPT solar charge. The main downside to this unit is when charging off both DC and solar, it limits either side to 15A. I likely should have got the 50A unit from Renogy but this will do for now.
View attachment 35527
Onto the solar I knew I needed more 400W on this camper as it’s larger and we are running more stuff off the 12V system. Also, with the mounted solar on the roof, different things like tree cover, clouds, etc can impact total Watts brought in. 12VDC power is one of my major anxiety points when boondocking, specifically in early/late season where we need it to run the heater.

As it was already summer, I opted for the easiest install first, which was mobile solar. I had used flexible 100W panels with my previous build and knew I didn’t want to do the same, so I opted for the 200W Renogy suitcase set-up. This was a wise decision as they are robust and much better quality.

I bought a heavy duty extension cord, cut the ends off and attached MC-4 (solar connectors) to one end to make a cord long enough to be able to move the panels around where I need them (in the sun). The 200W along with the MPPT make a great combination for now. I had a PWM controller on the old camper and it’s amazing how much more efficient the MPPT controller is.
View attachment 35529
I had used a standard SAE 12V connector to connect my mobile solar cord to the camper (and solar controller) previously. After some use, the weight of the cord combined combined with the SAE plug made it difficult to get a good connection as the pins had started to widen. I looked around for a simple, waterproof connection and had settled on some sort of trailer plug. I also knew I wanted to bring my solar power in but also have a 12VDC power out as we run an ARB fridge outside (usually beer, veggies etc) for extra cooled storage.

I found a super cool, magnetic 7-pin RV plug on E-trailer and used it. It’s a pigtail and I connect my solar “extension cord” to it as well as our fridge.
View attachment 35530
View attachment 35531
View attachment 35532
When i read your process it just sounds so easy. Im thinking to my self, i could totally do this. Then reality sets in and i remember i suck at this stuff. lol. Definitely an awesome setup and looks super clean.
 
When i read your process it just sounds so easy. Im thinking to my self, i could totally do this. Then reality sets in and i remember i suck at this stuff. lol. Definitely an awesome setup and looks super clean.
Honestly, nothing is super complicated to do. The hard part is making it look nice which is not in my skill set but I’m learning. I’ve always been a “function over form” type person but when the “function” becomes easy, the “form” becomes the challenge.

In our first travel trailer, I made a “suicide cord” to connect the inverter to the rest of the AC items in the camper. Prime example of function over form and I knew I didn’t want to do that again.

The great thing about the internet is there are a ton of resources out there to figure out how to do stuff like this (and everything). All it takes is the will to go do it. Most things, I look at and say “wow, I think I could do that” and I try it.
I made a transfer switch for mine with relays. Shore power connected to coil on relay and NO contact. Inverter connected to NC contact and branch circuit connected to common contact terminal. I made 2 of them cause I had 2 circuits I wanted the inverter to power. Its automatic if the inverter is switched on and you lose shore power the tv will never even turn off.
 
I made a transfer switch for mine with relays. Shore power connected to coil on relay and NO contact. Inverter connected to NC contact and branch circuit connected to common contact terminal. I made 2 of them cause I had 2 circuits I wanted the inverter to power. Its automatic if the inverter is switched on and you lose shore power the tv will never even turn off.
I had thought hard about that my problem was I should really have a 3-way switch for generator/shore/inverter or another transfer after the existing transfer. Then the process of where to put it. It started to make my brain hurt so I went the manual way
 
First pull with the Tremor! Tows so much better than my F150 from a stability and ride standpoint. The 3.5EB in my F150 seemed to have a bit more grunt but I’ve just got to get used to punching it vs easing into the 7.3. That 7.3 LOVES the R’s pulling the passes. 5500RPM like nothing. Trans Braking took a bit to learn but after about 45 minutes it was doing a great job holding speeds going downhill.

651B36B9-9BCE-4782-8DCF-2D8F6E020D99.jpeg
FC58DB5F-ED97-4F65-A317-4CC5DDD775F1.jpeg
 
It is. Colorado is terrible. 😉
Every time we move, I vote for Denver. So far, I’ve got Cleveland OH and Stockton CA… To be fair though, they are both great in their own way. Cleveland has great food (not much else to do) and the weather in the summer is awesome. Stockton is 2h or less from Tahoe, Yosemite, San Francisco, Napa, Sonoma, etc. Still, I’m going to push harder for Denver next time.
 

Latest Discussions

Back
Top